 Save
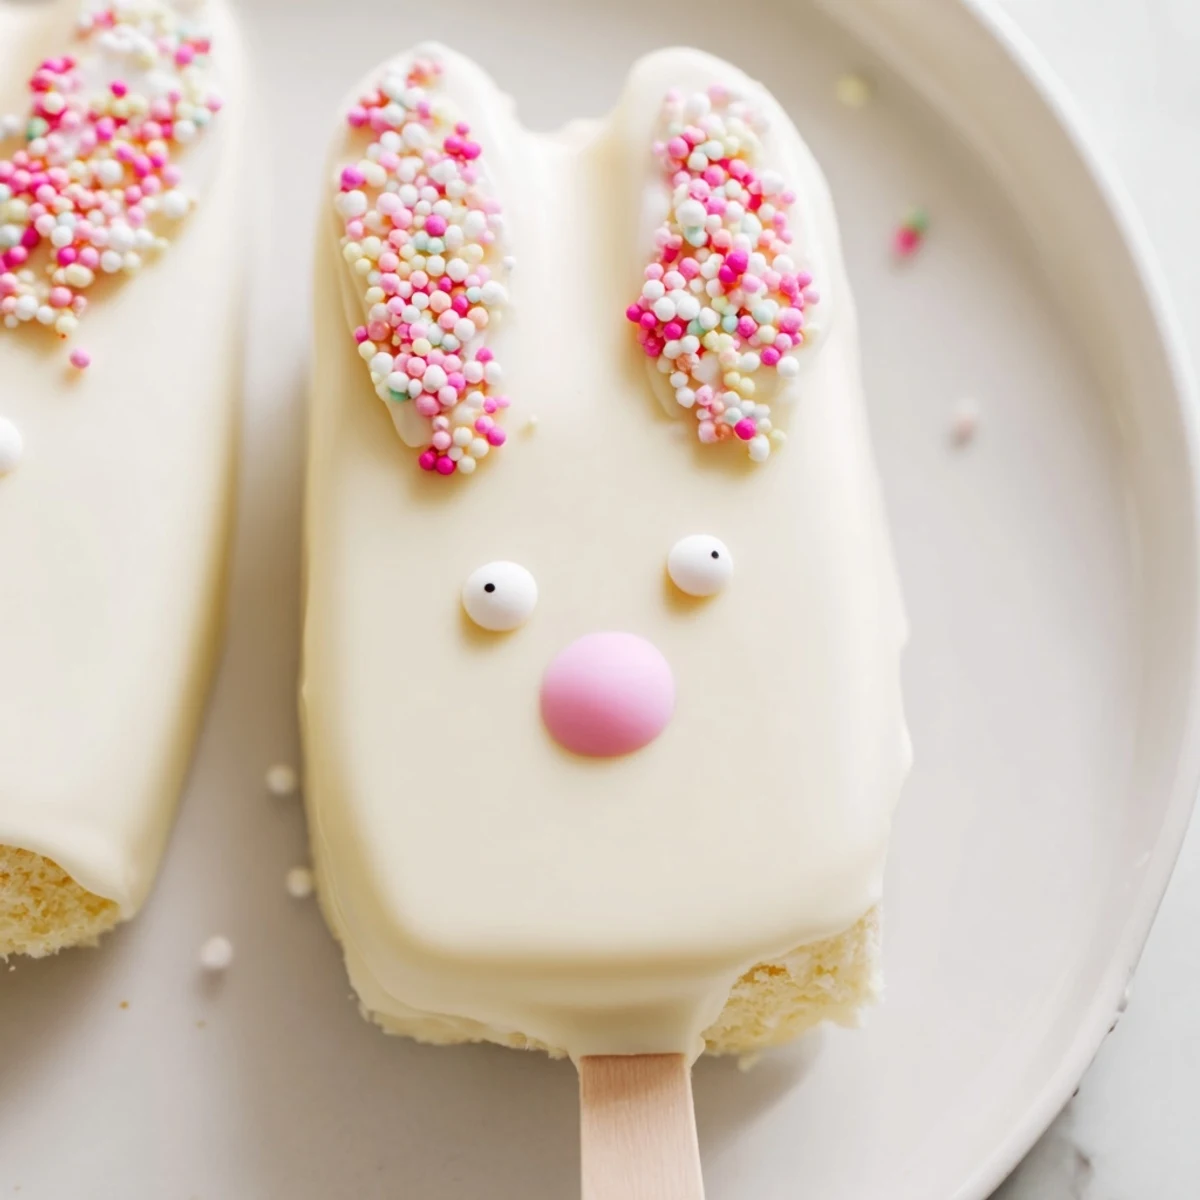
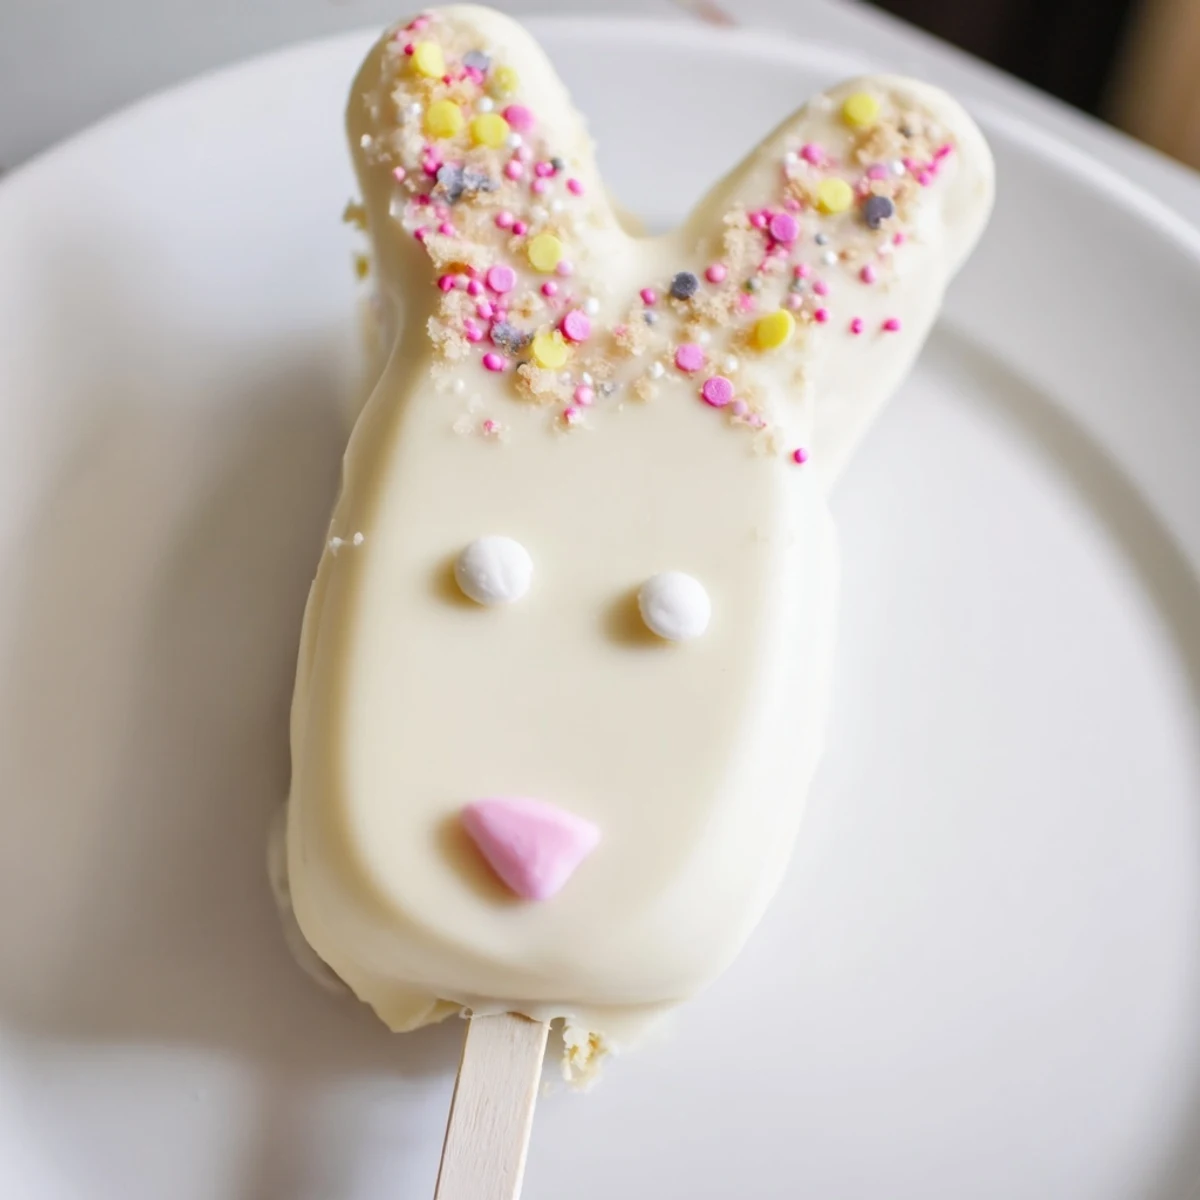
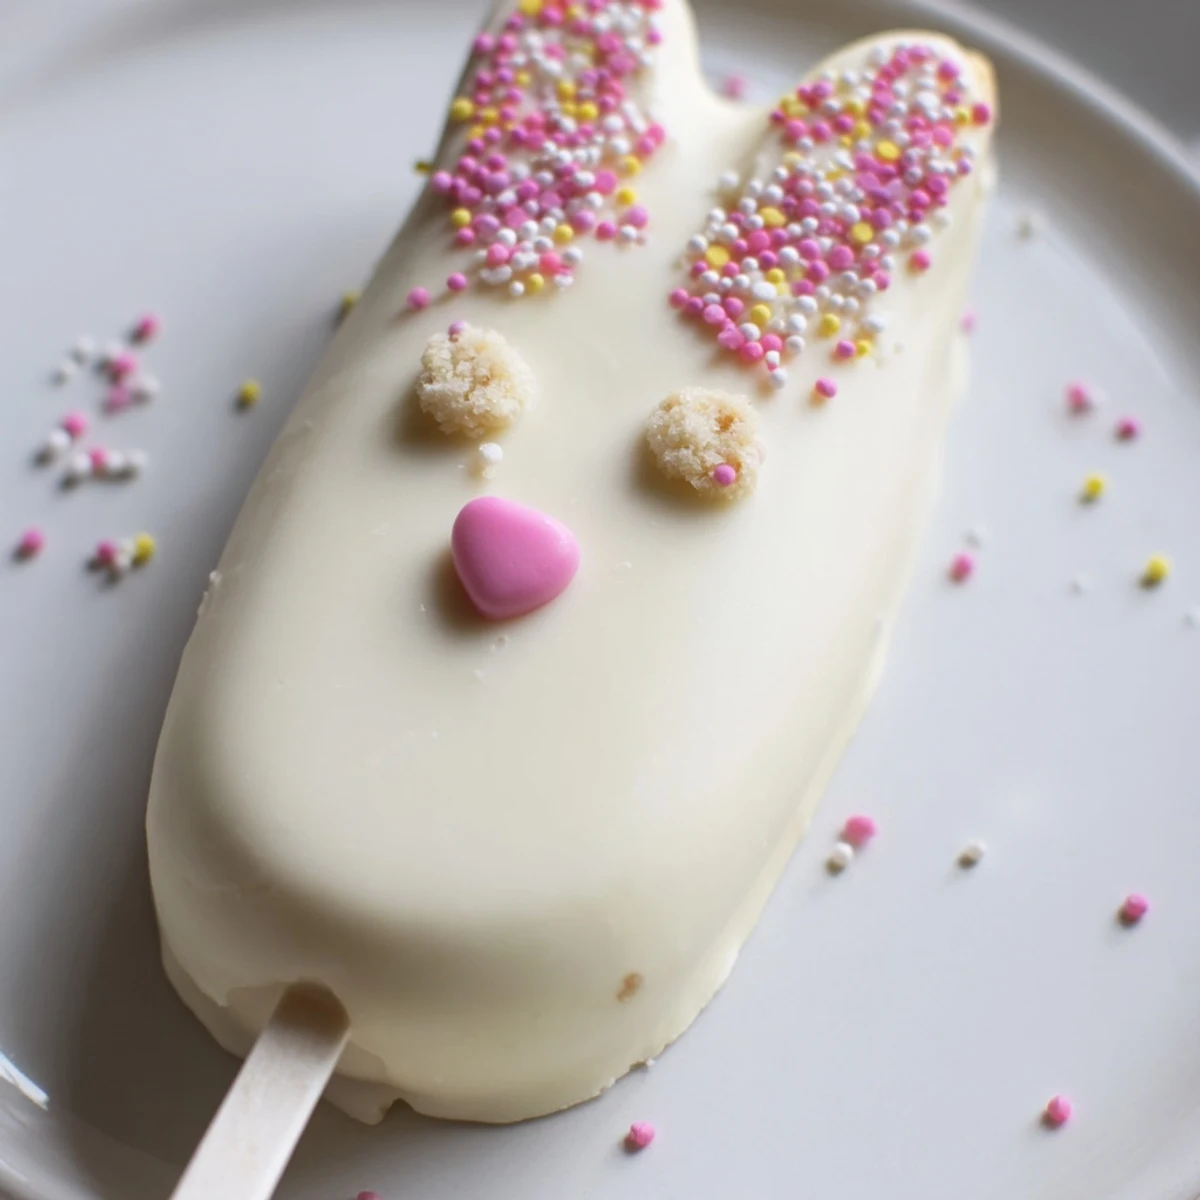
Save These adorable white chocolate bunny cakesicles combine moist vanilla cake crumbs with cream cheese and butter for the perfect dough-like consistency. Each treat gets dipped in smooth white chocolate and decorated with candy eyes, sprinkles, and fondant bunny ears for irresistible Easter charm.
The preparation comes together in just 25 minutes of active time, followed by a brief chilling period to ensure the shapes hold their form during dipping. The white chocolate coating creates a luscious shell that perfectly complements the tender, sweet interior.
Customize your bunny cakesicles with different food coloring shades for ears and noses, or experiment with various cake flavors like chocolate or lemon. These handheld treats are ideal for Easter baskets, dessert tables, or classroom celebrations.
The kitchen counter was scattered with pastel sprinkles and my daughter kept hovering around the bowl like she might somehow speed up the chilling process with pure willpower. We'd decided last minute to make something special for Easter brunch, and these bunny cakesicles ended up being the project that had both of us covered in white chocolate and laughing at our attempts to create symmetrical bunny ears.
Last year I made thirty six of these for a family potluck and my aunt asked me to teach her how to make them right there at the party. Something about that portable stick format and the whimsical bunny faces makes people unreasonably happy, like dessert just became playground magic.
Ingredients
- Vanilla cake crumbs: I use leftover cake from birthdays or cupcakes because the slight moisture level makes forming shapes effortless
- Cream cheese: Room temperature is non negotiable here, it binds everything together into that perfect dough like texture
- Unsalted butter: Softened butter adds richness without making the mixture too greasy or difficult to handle
- Powdered sugar: Just enough to sweeten the mixture and help it hold shape without turning into candy
- Vanilla extract: Pure vanilla makes the cake base taste intentional rather than like repurposed leftovers
- White chocolate: High quality melts make coating smoother and the finished taste infinitely better than bargain chips
- Edible gel food coloring: Gel colors wont seize your chocolate like liquid versions might
- Cakesicle sticks: Insert these before chilling or the mixture might crack when you try later
- Sprinkles and decorations: Have everything open and ready because the chocolate sets faster than you expect
Instructions
- Mix the cake base:
- Combine cake crumbs, cream cheese, butter, powdered sugar, and vanilla in a medium bowl, mixing until everything comes together into a dough that holds its shape when squeezed.
- Shape your bunnies:
- Portion the mixture into eight equal pieces and press each into a flattened oval with slightly pointed ears at the top, working quickly so the warmth from your hands doesn't soften everything.
- Insert and chill:
- Gently push a cakesicle stick into the center of each shape and refrigerate for at least twenty minutes until firm enough to handle without leaving fingerprints.
- Melt the coating:
- Heat white chocolate in thirty second intervals, stirring between each, until completely smooth and dipping consistency.
- Coat completely:
- Dip each chilled cake into the chocolate, letting excess drip off for a moment before tapping the stick against the bowl edge to remove drips.
- Decorate immediately:
- Press candy eyes, sprinkles, or fondant features into the soft coating before it sets, working quickly because white chocolate firms fast.
- Set and serve:
- Let the cakesicles harden at room temperature for about thirty minutes or refrigerate for ten minutes if you are in a hurry.
 Save
Save My niece took one bite during our Easter egg hunt last year and immediately abandoned the plastic eggs to demand I teach her how to make these. Watching her carefully place each candy eye with such serious concentration was the highlight of the whole day.
Making Them Ahead
I've learned through trial and error that these freeze beautifully before the chocolate coating step. Shape and insert sticks, then freeze on a tray for up to two weeks before dipping and decorating for fresh tasting results.
Flavor Variations
Chocolate cake crumbs with dark chocolate coating creates an incredibly sophisticated version that adults gravitate toward. Lemon cake with white chocolate and pastel sprinkles feels like spring on a stick.
Common Mistakes To Avoid
The difference between a successful batch and frustration usually comes down to temperature and patience. Keep these tips in mind and your bunny cakesicles will turn out adorably perfect every time.
- Never skip the chilling step or your shapes will slide right off the sticks into the chocolate
- Work with just a few pieces at a time once you start dipping so the chilled ones don't soften
- Have your decorations opened and arranged before you melt any chocolate
 Save
Save These have become the one Easter treat my family actually requests by name, and honestly, I look forward to our annual sprinkle covered kitchen adventure just as much as they do.
Recipe Questions & Answers
- → How far in advance can I make these bunny cakesicles?
-
Prepare the cake mixture and shape the bunnies up to 2 days ahead. Store them in an airtight container in the refrigerator, then dip and decorate on the day you plan to serve for the freshest appearance.
- → What's the best way to melt white chocolate for dipping?
-
Melt white chocolate in a microwave-safe bowl in 30-second intervals at 50% power, stirring between each interval. This gentle heating prevents seizing and ensures smooth, pourable consistency for even coating.
- → Can I use store-bought cake instead of homemade?
-
Absolutely! Store-bought vanilla cake or cupcakes work perfectly. Simply crumble them finely and mix with the cream cheese binder. This shortcut saves time while still delivering delicious results.
- → How do I prevent the cakesicles from falling off the sticks?
-
Chill the shaped bunny mixture for at least 20-30 minutes before inserting the sticks. Push the stick about halfway through, then gently press the surrounding mixture to secure it. The cold temperature helps the cake hold its shape.
- → What other decorations work well for bunny features?
-
Fondant ears and noses create professional-looking bunnies. Pink candy melts, edible food coloring markers, heart-shaped sprinkles for noses, and miniature chocolate chips for eyes all add delightful character to your treats.
- → Can these cakesicles be frozen for later?
-
Yes! After dipping and decorating, freeze them in a single layer until solid, then transfer to an airtight container with parchment paper between layers. Thaw in the refrigerator for 2-3 hours before serving.
