 Save
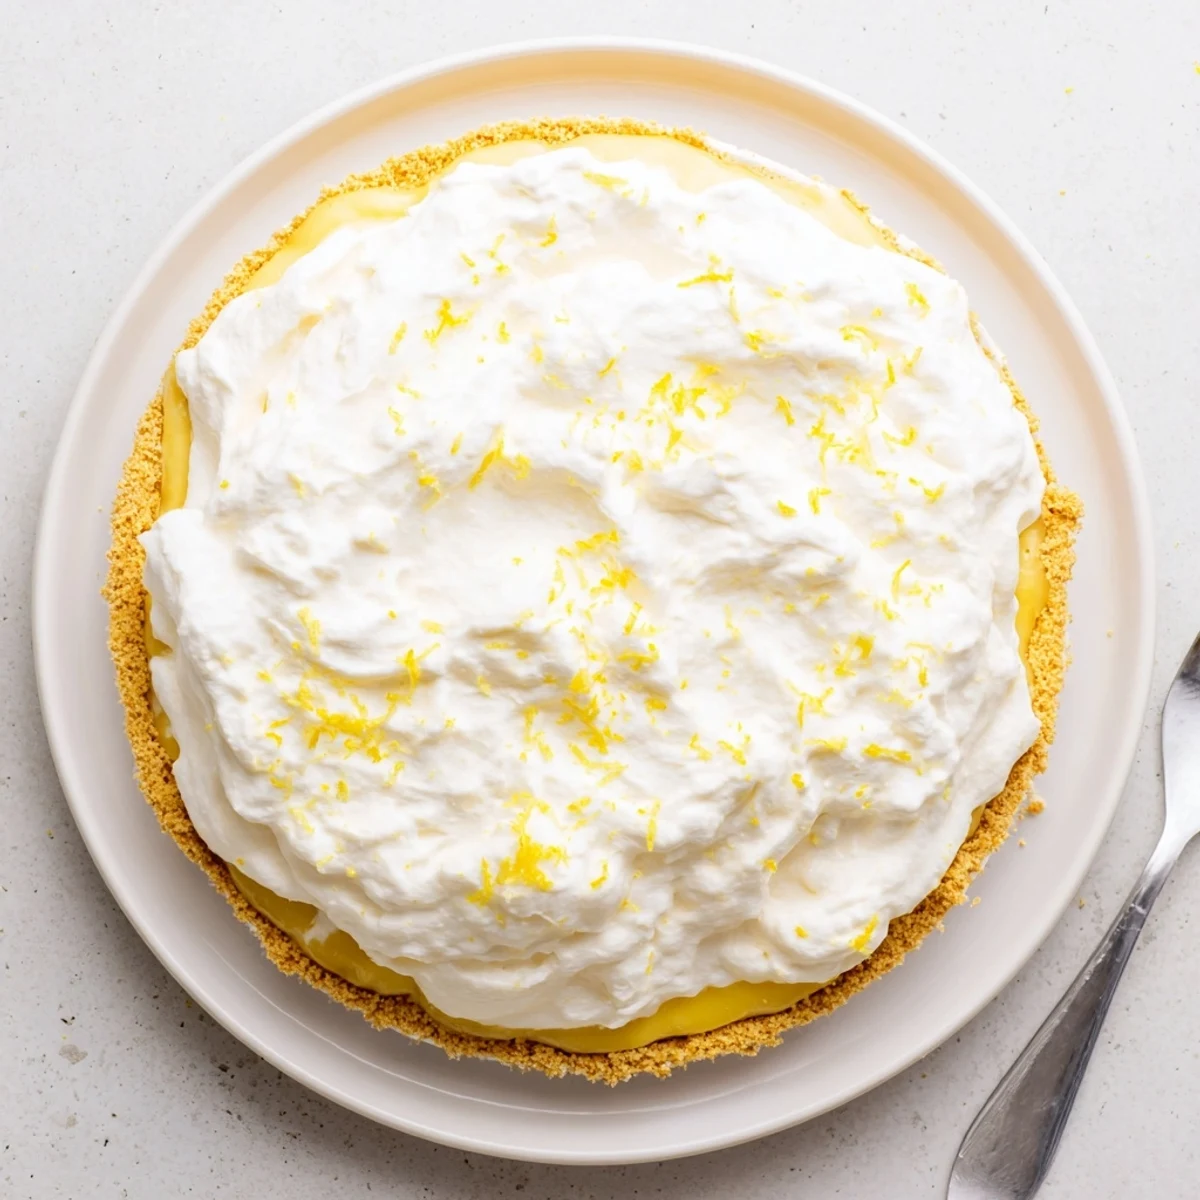
Save This classic American lemon pie features a buttery graham cracker crust filled with a silky, tangy citrus filling made from freshly squeezed lemon juice, zest, and egg yolks. The stovetop custard is cooked until thick and glossy, then chilled until perfectly set.
Topped with lightly sweetened whipped cream, each slice delivers a vibrant balance of sweet and tart flavors. Allow at least 2 hours of chilling time for the cleanest slices.
The screen door slammed shut behind me as I balanced a bag of Meyer lemons someone had left on my porch that February morning. I had no plan for them until the smell of zest hit my fingertips and suddenly I was back in my grandmothers kitchen, watching her stir a lemon filling with the focus of a surgeon. That afternoon I made this pie three times before getting it right, and my kitchen still smelled like citrus two days later.
I brought a wobbly version of this to a potluck once, convinced it was a failure because it refused to set in time. A friend leaned over and whispered that it was the best thing on the table, and she was not just being polite because she came back for thirds.
Ingredients
- Graham cracker crumbs (1 1/2 cups): Freshly crushed crackers give a better texture than store bought crumbs, which can be too fine and dusty.
- Granulated sugar for crust (1/4 cup): Just enough sweetness to make the crust feel like part of the dessert rather than a neutral base.
- Unsalted butter, melted (6 tbsp): This binds the crumb together and creates that satisfying snap when you cut a slice.
- Granulated sugar for filling (1 cup): Balances the acidity of the lemon juice without muting its brightness.
- Cornstarch (2 tbsp): The thickening hero that turns a thin liquid into a glossy, spoon coating custard.
- All purpose flour (1 tbsp): Works alongside cornstarch to stabilize the filling so it slices cleanly.
- Salt (1/4 tsp): A small pinch that wakes up every other flavor in the pie.
- Water (1 cup): Provides the volume needed to build a silky filling without diluting the lemon punch.
- Lemon zest (2 tsp grated): This is where the perfume lives, so zest before you juice and use a light hand to avoid the bitter white pith.
- Freshly squeezed lemon juice (1/2 cup): Skip the bottled stuff entirely because nothing matches the alive, floral quality of real lemons.
- Egg yolks (3 large, lightly beaten): Yolks add richness and color, and tempering them properly is the difference between silk and scrambled.
- Unsalted butter for filling (2 tbsp): Stirred in at the end for a glossy, buttery finish that makes the filling taste luxurious.
- Heavy whipping cream (1 cup): Whips into a cloud like topping that cools and contrasts the bright filling below.
- Powdered sugar (2 tbsp): Sweetens the cream gently without weighing it down.
- Vanilla extract (1/2 tsp): Rounds out the cream with a warm, fragrant note.
Instructions
- Build the crust:
- Preheat your oven to 350 degrees F. Toss the graham crumbs, sugar, and melted butter together until the mixture feels like damp sand, then press it firmly into the bottom and up the sides of a 9 inch pie dish using the back of a spoon or your knuckles.
- Bake and cool the shell:
- Slide the crust into the oven for 8 to 10 minutes until it smells toasty and the edges darken slightly. Let it cool completely while you work on the filling so it does not soften under the heat of the custard.
- Start the lemon filling:
- Whisk sugar, cornstarch, flour, and salt together in a medium saucepan until no lumps remain. Pour in the water, lemon zest, and lemon juice gradually, whisking the whole time so nothing clumps on the bottom.
- Cook until thick:
- Set the pan over medium heat and stir constantly with your whisk for about 4 to 6 minutes. You will feel the moment it thickens because the whisk starts to leave visible trails through the bubbling mixture.
- Temper the yolks:
- Scoop a few spoonfuls of the hot mixture into your beaten yolks while whisking furiously to slowly raise their temperature. Pour the warmed yolks back into the saucepan and cook for another 2 minutes, stirring until the filling looks thick, glossy, and confident.
- Finish and fill:
- Take the pan off the heat and stir in the butter until it melts completely into the custard. Pour the filling into your cooled crust, smooth the top, and let it sit at room temperature before refrigerating for at least 2 hours.
- Whip the topping:
- Beat the heavy cream, powdered sugar, and vanilla with an electric mixer until stiff peaks form. Spread or pipe it generously over the chilled pie, making swoops and peaks because the texture is part of the charm.
 Save
Save One summer evening I set a freshly topped slice on the porch railing and watched the whipped cream catch the golden light while a neighbor walked by and stopped mid sentence to ask what on earth smelled so good.
When Life Gives You Lemons
Not all lemons are created equal, and this recipe will teach you that quickly. Meyer lemons give a softer, more floral filling, while regular Eureka lemons deliver that classic sharp pucker. I have used both depending on what the tree in the yard was doing, and the pie always works, but the personality shifts.
Serving and Pairing Ideas
A handful of fresh raspberries or blueberries scattered over each slice adds color and a gentle sweetness that plays beautifully with the tart filling. A cup of strong black coffee or a glass of cold prosecco alongside turns a simple dessert into something that feels like an occasion without any extra effort.
Storage and Make Ahead Notes
This pie actually tastes better on the second day when the filling has fully settled into the crust and the flavors deepen overnight. Keep it loosely covered in the refrigerator and consume within three days for the best texture and flavor.
- Wrap the pie gently with plastic wrap without pressing it against the cream topping.
- The crust may soften slightly overnight but holds its shape well enough for clean slices.
- Always return leftover pie to the fridge promptly because the cream topping is perishable.
 Save
Save Some desserts ask you to perform, but this one just asks you to pay attention. The reward is a pie that tastes like sunshine with a spoon, and there is nothing better than that.
Recipe Questions & Answers
- → How do I prevent the lemon filling from curdling?
-
Always temper the egg yolks by slowly whisking small amounts of the hot lemon mixture into them before combining everything back in the saucepan. This gradual temperature increase prevents the eggs from scrambling and keeps the filling smooth and silky.
- → Can I use bottled lemon juice instead of fresh?
-
Freshly squeezed lemon juice delivers the brightest, most authentic flavor. Bottled juice can taste flat or slightly bitter. For the best results, use 2 to 3 fresh lemons and don't skip the grated zest — it adds concentrated citrus oils that elevate the entire filling.
- → How long should the pie chill before serving?
-
The pie needs at least 2 hours in the refrigerator for the filling to set properly. For the cleanest slices, overnight chilling works best. Always serve the pie chilled, and make sure it is fully cooled to room temperature before transferring it to the fridge.
- → Can I make this pie ahead of time?
-
Yes, this lemon pie actually benefits from being made a day in advance. The filling sets more firmly and the flavors meld together overnight. Add the whipped cream topping just before serving for the freshest presentation and texture.
- → What can I substitute for graham crackers in the crust?
-
You can use crushed digestive biscuits, vanilla wafers, or even crushed shortbread cookies as alternatives. Each brings a slightly different flavor profile. Keep the same ratio of crumbs to melted butter and sugar for a crust that holds together when pressed into the pie dish.
- → How do I get clean slices when cutting the pie?
-
Ensure the pie is fully chilled before slicing. Use a sharp knife dipped in hot water and wiped clean between each cut. This technique prevents the filling from sticking to the blade and gives you neat, presentable portions every time.
