 Save
Save Candying orange peels is a time-honored European tradition that transforms humble citrus rinds into something truly special. The process involves blanching the peels multiple times to remove bitterness, then slowly simmering them in sugar syrup until translucent and tender.
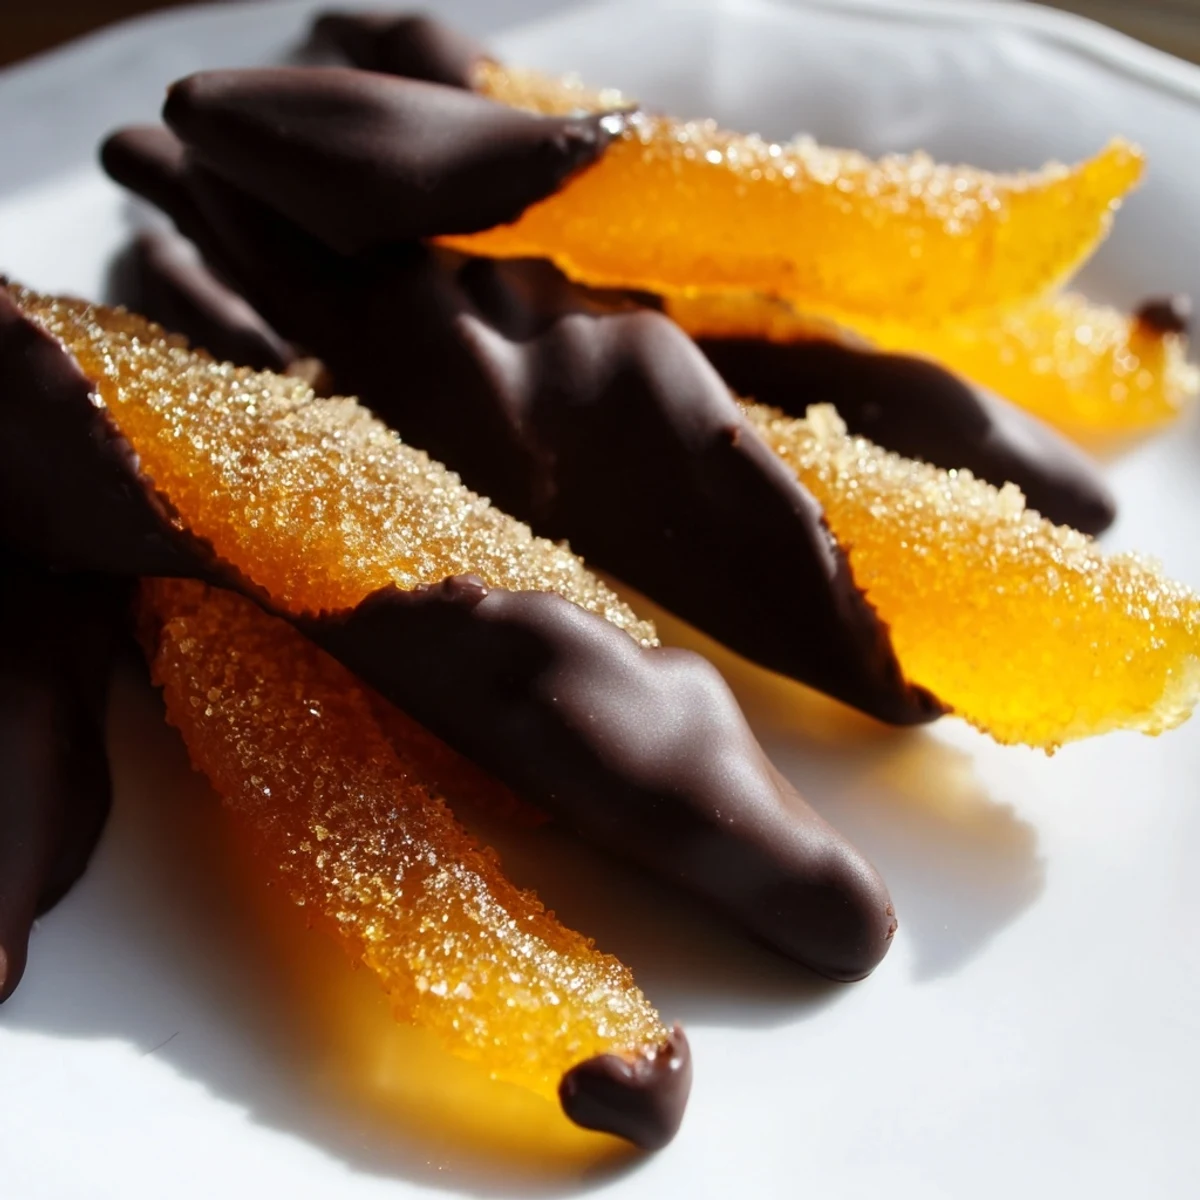
Once dried, each strip gets dipped halfway into melted dark chocolate, creating a beautiful contrast between the bright, sweet-tangy citrus and the rich, slightly bitter cocoa. The result is an elegant confection that pairs wonderfully with espresso or dessert wine.
While the process takes patience with cooling and drying time, the active preparation is straightforward and rewarding. These keep well in an airtight container for up to two weeks, making them perfect for gifting or entertaining.
The smell of orange oil bursting from a fresh peel is one of those small kitchen miracles that stops me in my tracks every single time. I started making these chocolate dipped orange peels on a rainy Tuesday when I had three oranges sitting on the counter and a restless afternoon to fill. Now they show up in little cellophane bags tied with twine at every holiday gathering, birthday dinner, and random Tuesday that deserves something special.
I brought a tin of these to my neighbor Magdas house last December and she stood in the doorway eating four of them before even taking her coat off. She called me the next morning to ask if I could teach her, and we spent an entire Saturday in her tiny kitchen blanching peels and laughing at how sticky everything got.
Ingredients
- 3 large oranges (preferably organic): Organic matters here because you are eating the skin, so wash them well and pick oranges with thick, vibrant peels for the best yield.
- 2 cups (400 g) granulated sugar: This is the backbone of your candying syrup, and you will be tempted to reduce it but trust the process.
- 1 cup (240 ml) water: Combined with the sugar it creates a syrup that penetrates the peels slowly and evenly.
- 200 g dark chocolate (60 to 70% cocoa), chopped: Stay in that range for a snap that holds without overwhelming the delicate orange flavor.
Instructions
- Prep the oranges:
- Wash them thoroughly, slice off the top and bottom of each one, score the skin into quarters, and peel away the sections with your fingers, keeping a little white pith attached for texture.
- Cut into strips:
- Slice the peels into uniform strips about half a centimeter wide so they candy evenly and look elegant when finished.
- Blanch three times:
- Cover the strips with cold water in a saucepan, bring to a rolling boil, drain completely, and repeat this two more times until the harsh bitterness melts away.
- Make the syrup:
- Combine sugar and water in a clean saucepan, stir gently over medium heat until the sugar fully dissolves and the liquid runs clear, then slide in your blanched peels.
- Simmer low and slow:
- Let the peels bubble away uncovered for 45 to 60 minutes, stirring once in a while, until they turn translucent and feel tender when you pinch one.
- Dry the peels:
- Lift them out with tongs and arrange on a wire rack, leaving them at room temperature for at least two hours or preferably overnight until the surface is no longer tacky.
- Melt the chocolate:
- Set a heatproof bowl over a pot of barely simmering water, add the chopped chocolate, and stir patiently until every last lump disappears into glossy silk.
- Dip each strip:
- Grab a peel and dip it halfway into the chocolate, letting the excess drip back into the bowl before placing it gently on a parchment lined tray.
- Let them set:
- Leave the tray at room temperature until the chocolate hardens completely, or slide it into the fridge for about twenty minutes if you are impatient like me.
 Save
Save There is something meditative about standing at the counter dipping peel after peel while the house is quiet and the chocolate smells impossibly rich. These little treats turned a mundane afternoon into a ritual I genuinely look forward to repeating.
Choosing the Right Oranges
Thick skinned navel oranges are your best friend here because they give you wide, sturdy strips that hold their shape through boiling and candying. Thin skinned varieties like Valencia work in a pinch but the yield is smaller and the strips tear more easily during the blanching process.
Getting the Chocolate Right
Chop the chocolate uniformly before melting so it melts evenly and you are not stuck stirring a bowl with half liquid chocolate and half stubborn chunks. Keep the water at a gentle simmer, never a rolling boil, because steam and condensation are the enemy of smooth tempered chocolate.
Storing and Gifting
Keep the finished peels in a single layer in an airtight container and they will stay beautiful for up to two weeks in a cool, dry spot. If you are stacking them, place a sheet of parchment between the layers so the chocolate does not stick.
- Roll the candied peels in extra sugar before dipping if you want a sweeter, sparkly finish.
- Milk or white chocolate works beautifully for anyone who finds dark chocolate too intense.
- Always check your chocolate label for allergens if you are sharing with others.
 Save
Save Every batch teaches you something small, and every tin you give away carries the warmth of an afternoon spent making something beautiful by hand. These chocolate covered orange peels are proof that the simplest ingredients reward patience with pure joy.
Recipe Questions & Answers
- → Do I need to remove all the white pith from the orange peels?
-
No, you don't need to remove all of it. Leaving a thin layer of white pith actually adds a pleasant texture and slight bitterness that balances the sweetness. The triple blanching process effectively reduces excessive bitterness from the pith.
- → What type of oranges work best for candied peels?
-
Organic oranges are strongly recommended since you're using the peel, which is exposed to any pesticides or wax treatments. Large, thick-skinned oranges like Navel or Seville varieties work particularly well because they yield wider, more substantial strips.
- → Why do I need to blanch the peels three times?
-
Multiple blanching rounds are essential for drawing out the bitter compounds concentrated in orange peels. Each boiling and draining cycle removes more bitterness, resulting in a pleasantly flavored candied peel rather than an overwhelming one. Skipping this step will leave you with unpleasantly bitter results.
- → Can I use milk or white chocolate instead of dark?
-
Absolutely. Milk or white chocolate creates a sweeter, milder confection that some people prefer. Keep in mind that white and milk chocolate are more sensitive to heat during melting, so use gentle heat and stir frequently to prevent seizing.
- → How do I know when the peels are done candying in the syrup?
-
Properly candied peels will appear translucent and feel tender when pierced with a fork. This typically takes 45 to 60 minutes of gentle simmering. They should still hold their shape but look somewhat glassy and feel soft throughout, not fibrous or tough in the center.
- → How should I store the finished chocolate-dipped peels?
-
Store them in an airtight container in a cool, dry place away from direct sunlight. They will keep well for up to two weeks. Avoid refrigerating them for long periods, as condensation can cause the chocolate to bloom and the candied peels to become sticky.
