 Save
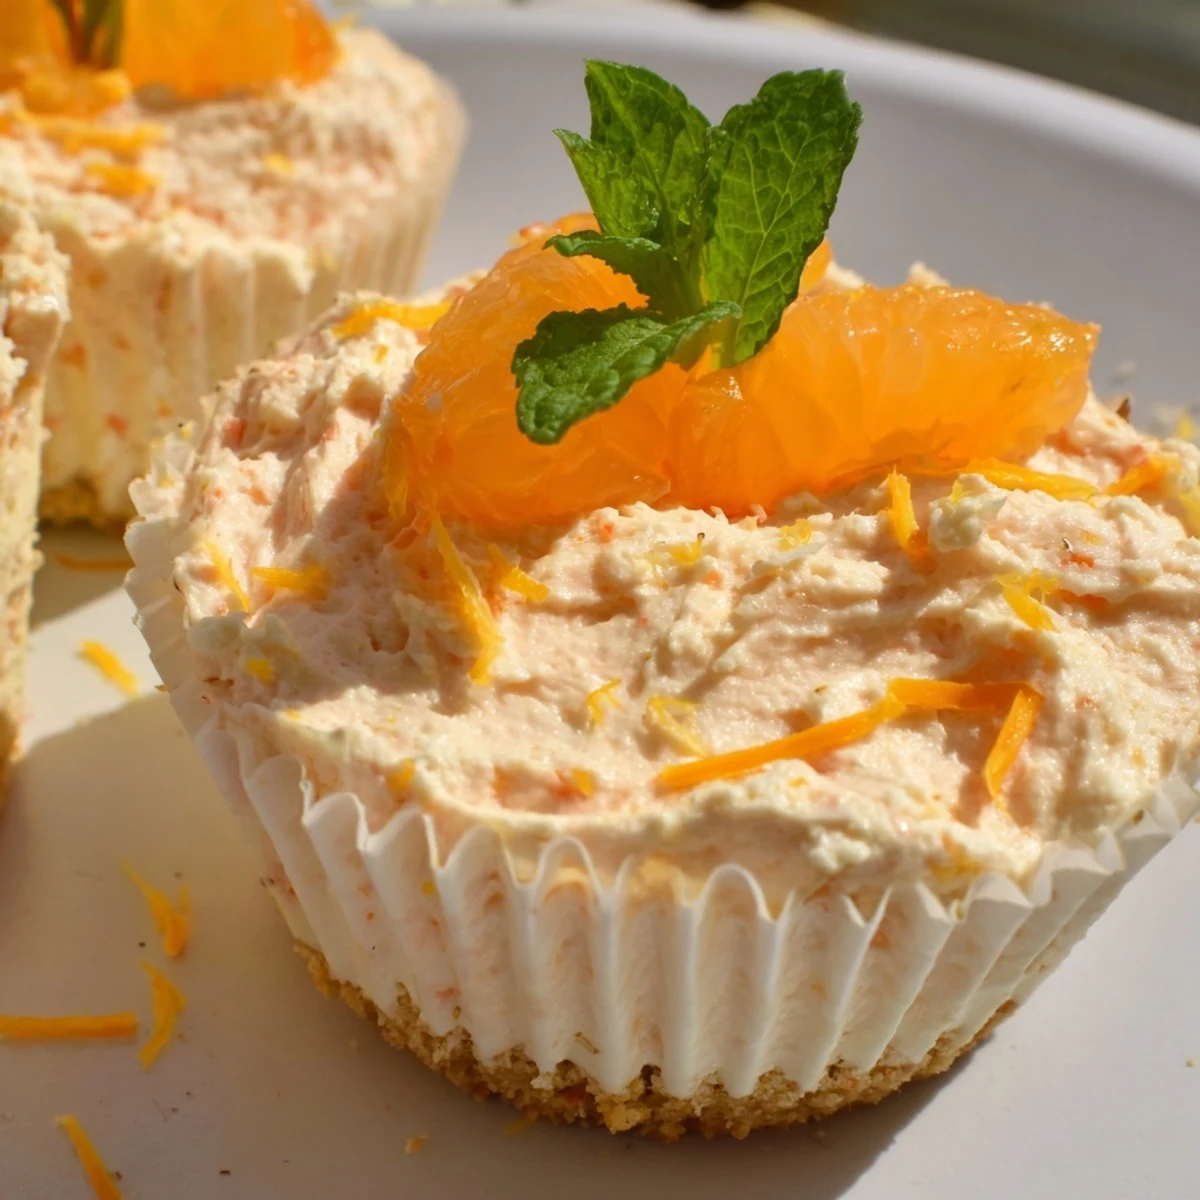
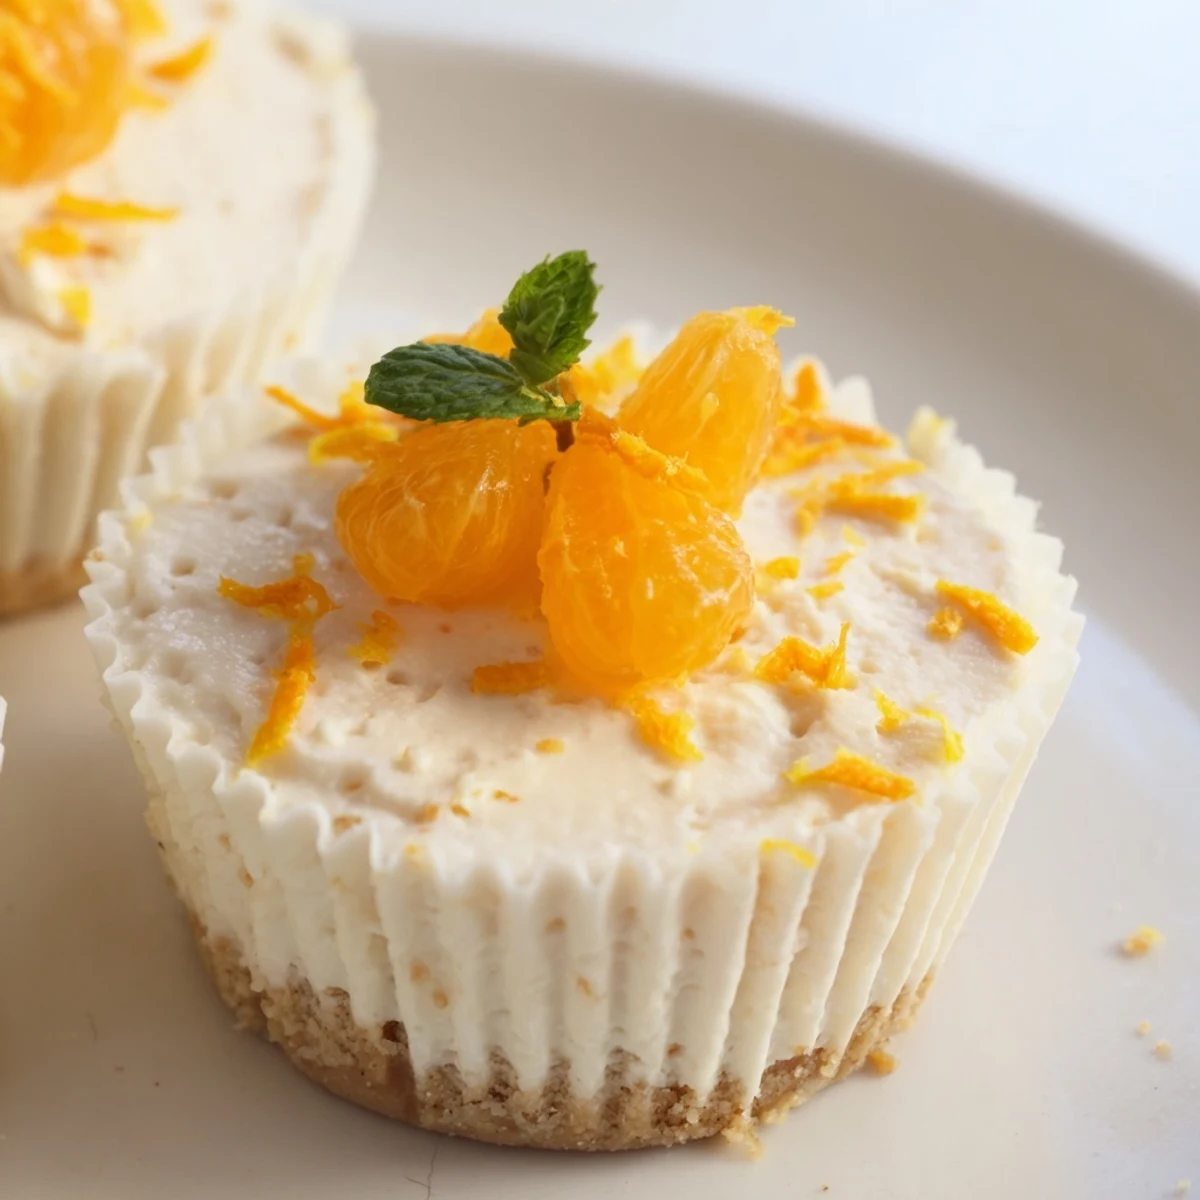
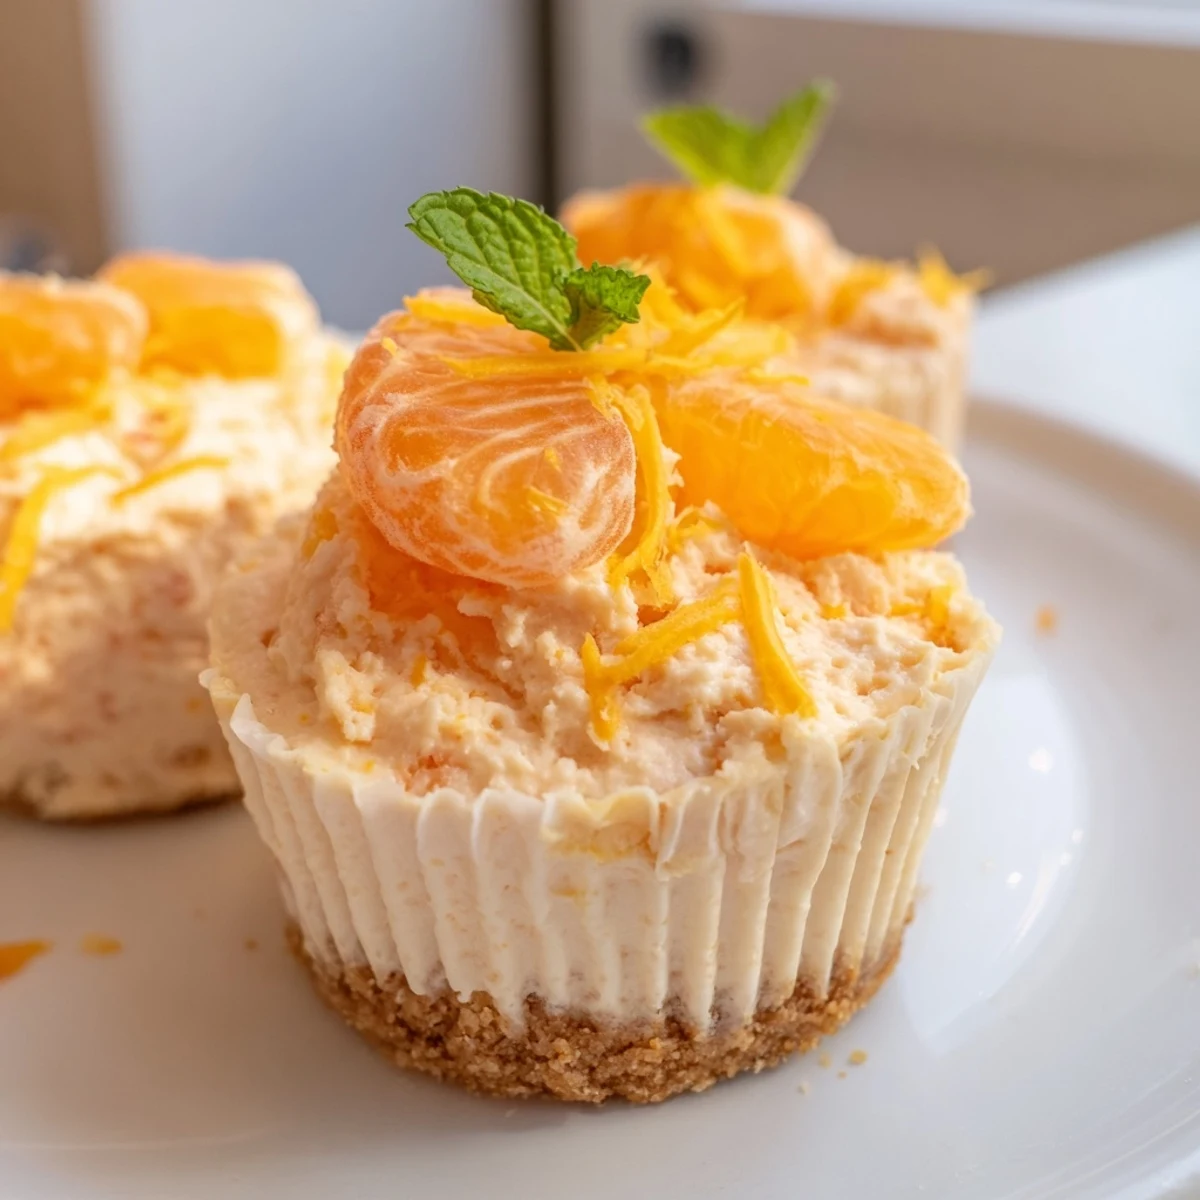
Save These mini no bake orange cheesecakes bring together a buttery digestive biscuit crust with a luscious, citrus-infused cream cheese filling. Fresh orange zest and juice deliver a bright, tangy flavor that cuts through the richness beautifully.
With zero oven time and just 25 minutes of hands-on preparation, they're an ideal make-ahead dessert for gatherings, summer parties, or whenever you crave something sweet and refreshing. Simply chill for a few hours until set, then garnish with fresh orange segments and mint.
The smell of orange zest hitting cream cheese is one of those small kitchen joys that stops you mid-stir and makes you close your eyes for a second. These mini no-bake orange cheesecakes came together one sweltering July afternoon when turning on the oven felt like a personal offense. They set up quietly in the fridge while I sat on the porch with a book and a glass of something cold. Three hours later I had six little sunshine colored desserts that tasted like a Mediterranean holiday.
I brought a tray of these to a friends rooftop gathering last summer and watched three adults get quietly competitive over the last one. Someone asked if I had bought them from a bakery, which remains one of the proudest moments of my amateur cooking life. The secret is really just patience during chilling and a heavy hand with the zest.
Ingredients
- Digestive biscuits or graham crackers (120 g): The base needs biscuits that crumble willingly but still hold together when pressed with butter.
- Unalted butter, melted (55 g): Acts as the glue for your crust and adds a subtle richness that margarine simply cannot replicate.
- Cream cheese, room temperature (250 g): Cold cream cheese will leave you with lumps no amount of beating can fix, so plan ahead.
- Powdered sugar (60 g): Dissolves seamlessly into the filling where granulated sugar would leave gritty surprises.
- Heavy cream, cold (120 ml): Whipping cold cream to stiff peaks gives the filling its cloud-like body and airy lift.
- Orange zest, 2 tsp from 1 large orange: This is where the magic lives, so zest only the colored skin and avoid the bitter white pith underneath.
- Fresh orange juice, 2 tbsp: Use freshly squeezed juice because the bottled kind tastes flat and lifeless in comparison.
- Vanilla extract, 1 tsp: A quiet background note that rounds out the citrus and makes everything taste more complete.
Instructions
- Prep your molds:
- Line a standard muffin tin with paper liners or reach for silicone molds if you want a cleaner release and prettier edges.
- Build the crust:
- Pulse the biscuits in a food processor until they resemble sandy crumbs, then pour in the melted butter and blitz again until everything feels like damp sand between your fingers.
- Press and chill the bases:
- Divide the crumb mixture evenly among your liners and press down firmly with the back of a spoon or a small glass to create a compact, even layer that will not crumble later.
- Start the filling:
- Beat the room temperature cream cheese and powdered sugar together in a medium bowl until the mixture turns completely smooth with no pale streaks remaining.
- Whip the cream:
- In a separate chilled bowl, whip the cold heavy cream until it holds stiff peaks that stand tall when you lift the beaters, stopping just before it turns grainy.
- Bring it all together:
- Gently fold the whipped cream into the cream cheese base with a spatula, then stir in the orange zest, orange juice, and vanilla until the filling is uniformly golden and silky.
- Fill and smooth:
- Spoon or pipe the filling over the chilled crusts, then run a small offset spatula or the back of a spoon across the tops to make them flush and neat.
- Chill until set:
- Refrigerate the cheesecakes for at least three hours, or until the filling feels firm and set when you gently press the center with your fingertip.
- Garnish and serve:
- Top each cheesecake with orange segments, a scatter of fresh zest, and a few mint leaves if you want that extra pop of color and freshness.
 Save
Save There is something deeply satisfying about pulling perfectly set mini cheesecakes from the fridge and watching people marvel at something that required zero baking skill.
Make It Your Own
Swap the orange for lemon or lime zest and juice if you want a sharper, more puckery variation. A tablespoon of orange liqueur folded into the filling elevates these into dinner party territory with almost no extra effort. For a gluten-free version, simply use your favorite gluten-free cookies for the base and everything else stays exactly the same.
Storing and Making Ahead
These cheesecakes actually improve overnight as the crust firms up and the orange flavor deepens throughout the filling. Keep them covered in the fridge for up to two days, though honestly they rarely last that long in my house. Avoid freezing them because the texture of the cream changes and gets oddly grainy upon thawing.
Tools That Make This Easier
A food processor makes quick work of the biscuits but a rolling pin and a ziplock bag work just as well if you need to work out some frustration. Silicone molds are worth the small investment because they release the cheesecakes cleanly without tearing the sides.
- Chill your mixing bowl before whipping the cream for faster and stiffer peaks.
- A small cookie scoop helps divide the crust evenly among all six cups.
- Always zest your orange before juicing it because a squeezed orange is nearly impossible to zest afterward.
 Save
Save These little cheesecakes are proof that the simplest desserts often leave the biggest impression. Make them once and they will become your warm weather staple.
Recipe Questions & Answers
- → How long do these mini cheesecakes need to chill before serving?
-
They require a minimum of 3 hours in the refrigerator to set properly. For the best texture, you can prepare them a day ahead and let them chill overnight.
- → Can I make these cheesecakes gluten-free?
-
Yes, simply substitute the digestive biscuits or graham crackers with your favorite gluten-free cookies. The rest of the ingredients are naturally gluten-free, so it's an easy swap.
- → What type of oranges work best for the filling?
-
Navel oranges are ideal because they're sweet, juicy, and have minimal seeds. Blood oranges can also be used for a beautiful color variation and slightly more complex citrus flavor.
- → Can I freeze these mini cheesecakes?
-
Yes, they freeze well for up to 1 month. Wrap each one individually in plastic wrap and store in an airtight container. Thaw in the refrigerator for a few hours before serving.
- → What can I substitute for heavy cream in the filling?
-
you can use cold mascarpone or thick Greek yogurt as a partial substitute. Keep in mind the texture may be slightly denser, but the flavor will still be delicious and creamy.
- → How far in advance can I prepare these for a party?
-
You can make them up to 2 days ahead and store them covered in the refrigerator. Add the fresh orange segment toppings and mint leaves just before serving for the best presentation.
