 Save
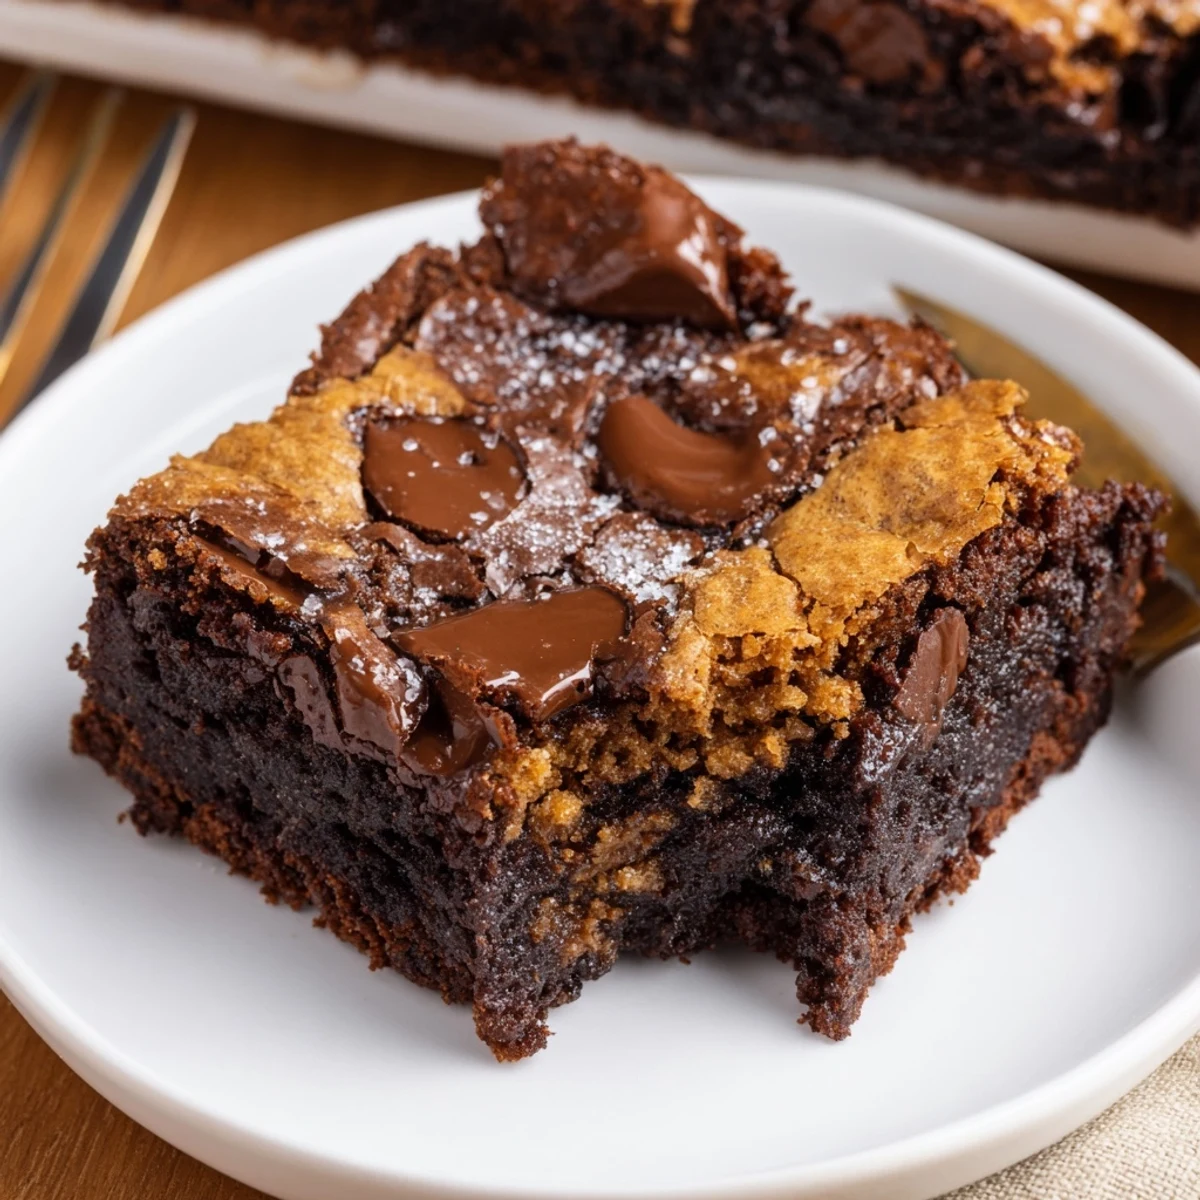
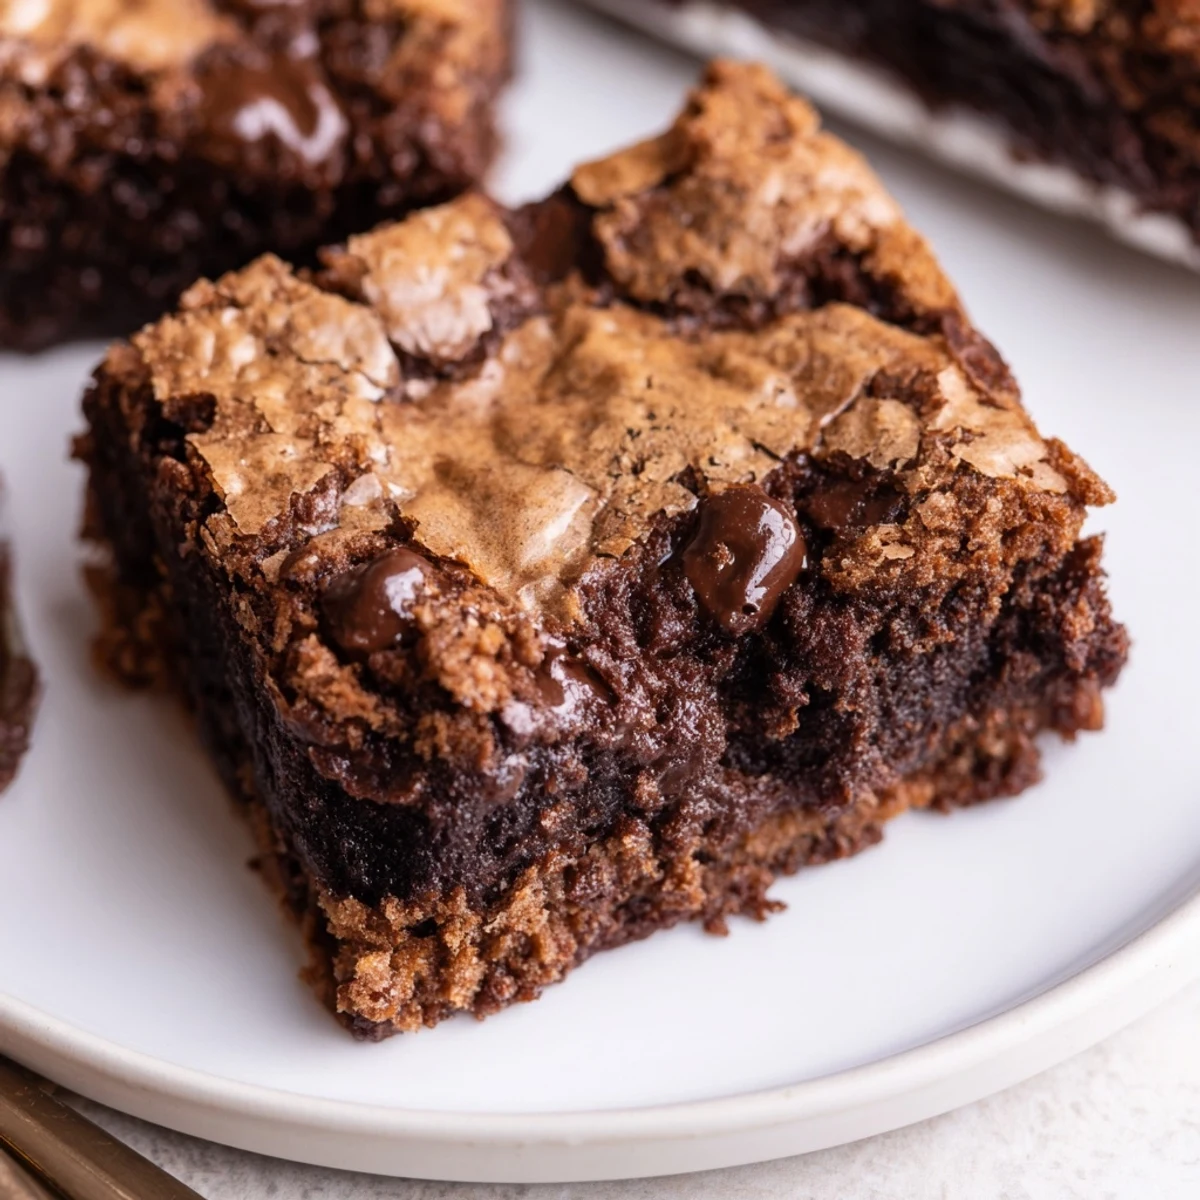
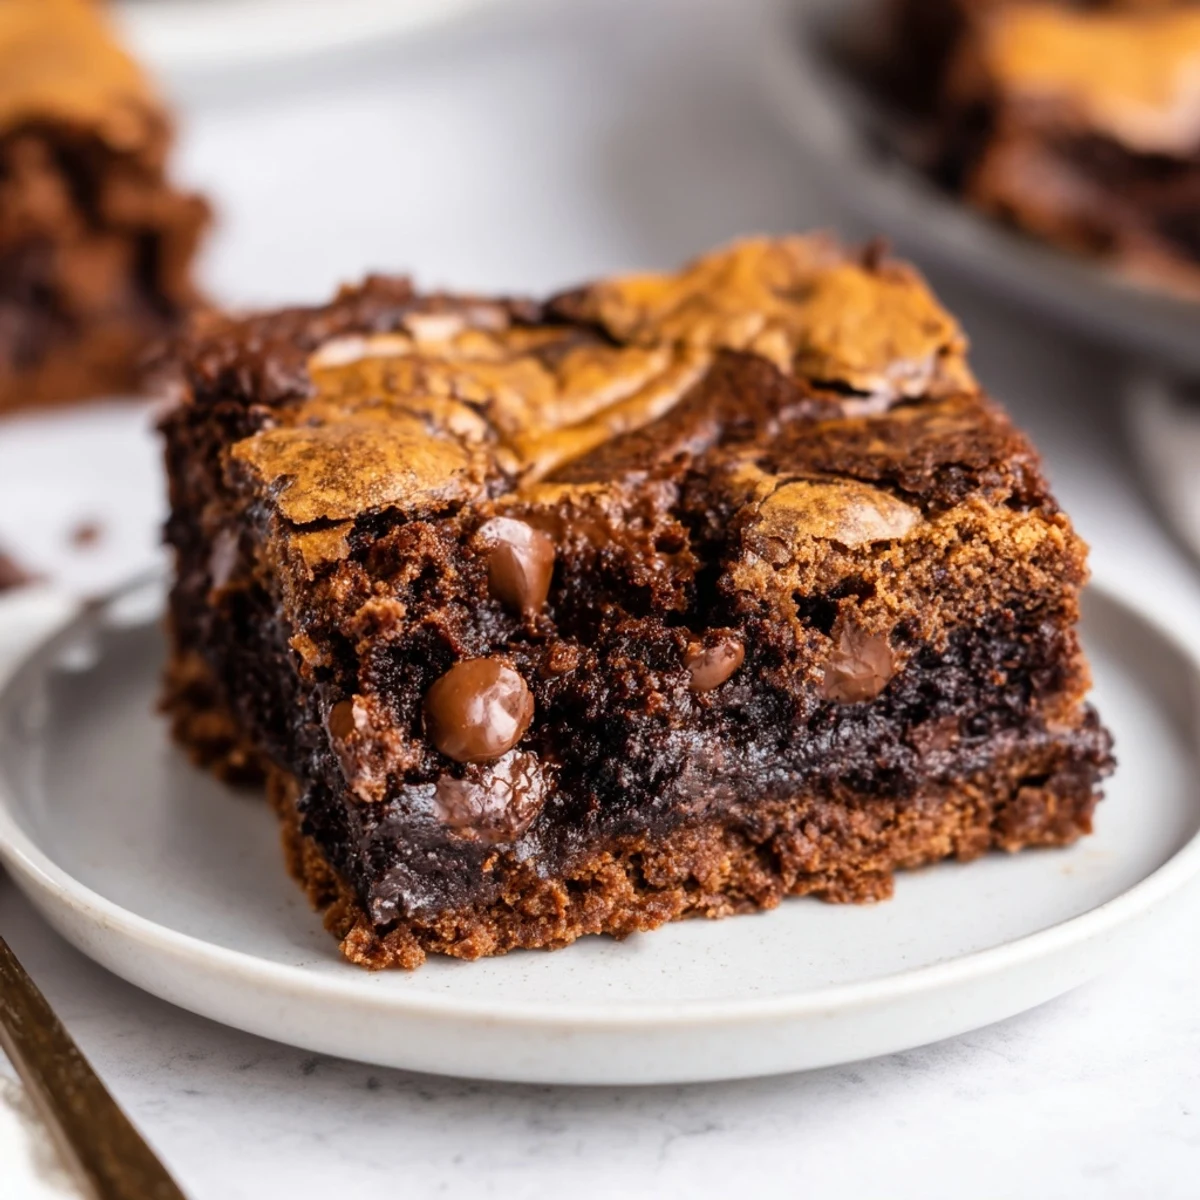
Save Combine a fudgy cocoa-based batter and a chewy chocolate-chip cookie dough in an 8-inch pan: spread the brownie batter first, drop spoonfuls of cookie dough on top and gently smooth so brownie peeks through. Bake at 175°C (350°F) for about 28–33 minutes until the top is golden and the center yields moist crumbs. Cool fully before cutting for clean bars; slightly underbake for a gooier center and chill before slicing. Add nuts or swap chips for variation.
My kitchen looked like a chocolate tornado had swept through it the afternoon I stumbled into brookies. I had promised both brownies and cookies for a potluck, realized I had exactly one baking pan, and decided to mash them together out of pure stubbornness. That chaotic experiment produced something so outrageously good that my friends now request it by name at every gathering. The fudgy brownie base meeting the chewy cookie top is the kind of beautiful accident you never stop being grateful for.
I brought a pan of these to my neighbor Marisas housewarming party last spring, still warm from the oven, and watched three grown adults abandon a perfectly good cheese board to hover near the kitchen counter. Within fifteen minutes the entire pan had vanished, and someone actually asked if I had hidden another one in my bag. That reaction told me everything I needed to know about this recipe.
Ingredients
For the Brownie Layer
- Unsalted butter (115 g, melted): Melted rather than softened butter is the secret to that dense fudgy texture that makes brownie lovers weak in the knees.
- Granulated sugar (200 g): This amount sounds like a lot but trust the process, the sugar creates that beautiful shiny crust on top.
- Large eggs (2): Room temperature eggs blend more smoothly into the batter and help create that rich structure.
- Vanilla extract (1 tsp): A small amount goes a long way in enhancing the deep chocolate flavor throughout the brownie base.
- All purpose flour (65 g): Less flour than you expect is exactly the point here, restraint keeps the brownie layer dense and gooey.
- Unsweetened cocoa powder (30 g): This is where all the chocolate intensity lives, so use a brand you genuinely enjoy the taste of.
- Salt (1/4 tsp): Just enough to sharpen every chocolate note without ever tasting salty.
For the Cookie Layer
- Unsalted butter (115 g, softened): Softened butter creams beautifully with the sugars to create that classic chewy cookie texture up top.
- Brown sugar, packed (100 g): The molasses in brown sugar adds warmth and keeps the cookie layer soft for days.
- Granulated sugar (50 g): A blend of both sugars gives you the best of both worlds, chew and slight crispness at the edges.
- Large egg (1): Binds the cookie dough together and adds richness that complements the brownie layer underneath.
- Vanilla extract (1 tsp): Repeat after me, there is no such thing as too much vanilla in a chocolate dessert.
- All purpose flour (150 g): The cookie layer needs more structure than the brownie base, so do not be tempted to reduce this amount.
- Baking soda (1/2 tsp): Gives the cookie layer just a hint of lift so it does not turn into a dense brick on top of your brownies.
- Salt (1/2 tsp): Balances the sweetness and makes the chocolate chips taste even more pronounced.
- Chocolate chips (110 g): Fold these in gently and try not to eat half of them straight from the bag before they make it into the dough.
Instructions
- Get your oven ready:
- Preheat your oven to 175 degrees C (350 degrees F) and line a 20x20 cm baking pan with parchment paper, leaving the edges hanging over like little handles. Those overhangs will save you when its time to lift the whole slab out cleanly.
- Build the brownie base:
- In a medium bowl, whisk the melted butter and sugar together until glossy and smooth. Beat in the eggs one at a time followed by the vanilla, then gently fold in the flour, cocoa powder, and salt until everything just disappears into the batter. Spread this chocolatey goodness evenly across the bottom of your prepared pan.
- Make the cookie dough:
- Beat the softened butter with both sugars until the mixture looks creamy and light. Mix in the egg and vanilla until fully incorporated, then add the flour, baking soda, and salt, stirring until the dry ingredients vanish. Fold in the chocolate chips with a spatula, resisting the urge to snack along the way.
- Layer it all together:
- Drop generous spoonfuls of cookie dough all over the brownie batter, then use a spatula to gently nudge it toward the edges. Some brownie peeking through is perfectly fine and actually creates those gorgeous marbled bits when you slice into it later.
- Bake with patience:
- Slide the pan into the oven and bake for 28 to 33 minutes, watching for the cookie layer to turn a beautiful golden brown. A toothpick inserted in the center should come out with a few moist crumbs clinging to it, not wet batter, and definitely not completely clean.
- Cool completely before slicing:
- This is the hardest part of the entire recipe. Let the brookies cool fully in the pan so the layers set properly, then use the parchment handles to lift everything out and cut into 16 generous bars.
 Save
Save The moment I lifted the parchment paper and saw those two distinct layers staring back at me, dark and fudgy on the bottom, golden and studded with chocolate chips on top, I felt like I had discovered something magical. Cutting into them and watching the knife glide through both textures was oddly satisfying in a way I was not prepared for.
The Right Pan Makes All the Difference
A 20x20 cm metal baking pan conducts heat evenly and gives you those perfectly crisp edges everyone fights over. Glass pans work too but tend to bake hotter, so reduce your oven temperature by about 10 degrees if that is what you have. Whatever you use, the parchment paper is non negotiable unless you enjoy chiseling brownie bits out of corners.
Mix Ins and Swaps Worth Trying
Once you have mastered the classic version, this recipe becomes a playground. Chopped walnuts or pecans folded into the brownie batter add a welcome crunch that cuts through all that richness. Butterscotch chips in place of chocolate chips transform the cookie layer into something unexpectedly warm and caramel like.
Serving and Storing Your Brookies
These bars stay wonderfully fresh in an airtight container at room temperature for up to four days, though they rarely last that long in my house. A quick ten second zap in the microwave brings back that just baked gooeyness whenever the mood strikes.
- Serve warm with a generous scoop of vanilla bean ice cream melting on top for an unforgettable dessert.
- Freeze individual bars wrapped tightly in plastic wrap for up to three months, they thaw beautifully.
- Always let them cool completely before storing or the condensation will make them soggy and sad.
 Save
Save Every time I make brookies, I think about that frantic afternoon when desperation turned into inspiration, and I smile knowing that sometimes the best recipes are born from beautiful accidents. Share them generously and watch people fall in love.
Recipe Questions & Answers
- → How do I get fudgy centers without overbaking?
-
Bake until a toothpick shows moist crumbs rather than coming out clean. Slightly underbaking and then cooling or chilling the pan helps the center set while keeping a fudgy texture. Use the specified 8-inch pan and avoid overmixing the batter.
- → Can I swap the chocolate chips for other mix-ins?
-
Yes. Chunks of dark or milk chocolate, butterscotch chips, or chopped nuts work well. Larger mix-ins will change bake time slightly and may affect how evenly the cookie layer spreads.
- → What pan size and yield should I expect?
-
Use a 20×20 cm (8×8 inch) pan to match the cooking times and yield about 16 bars. Using a larger pan will thin the layers and reduce bake time; a smaller pan will require longer baking.
- → How can I keep the cookie layer from sinking into the brownie?
-
Drop spoonfuls of cookie dough and gently spread rather than fully pressing it down. A slightly stiffer cookie dough and minimal spreading help keep distinct layers. Chilling the cookie dough briefly can also prevent excessive sinking.
- → What’s the best way to store and reheat the bars?
-
Store cooled bars in an airtight container at room temperature for up to 2 days or in the refrigerator for up to 5 days. Reheat briefly in a microwave or warm in a low oven to revive a gooey texture before serving.
- → Can these be made ahead or frozen?
-
Yes. Freeze fully cooled, well-wrapped bars for up to 2 months. Thaw in the refrigerator or at room temperature and warm gently before serving for best texture.
