 Save
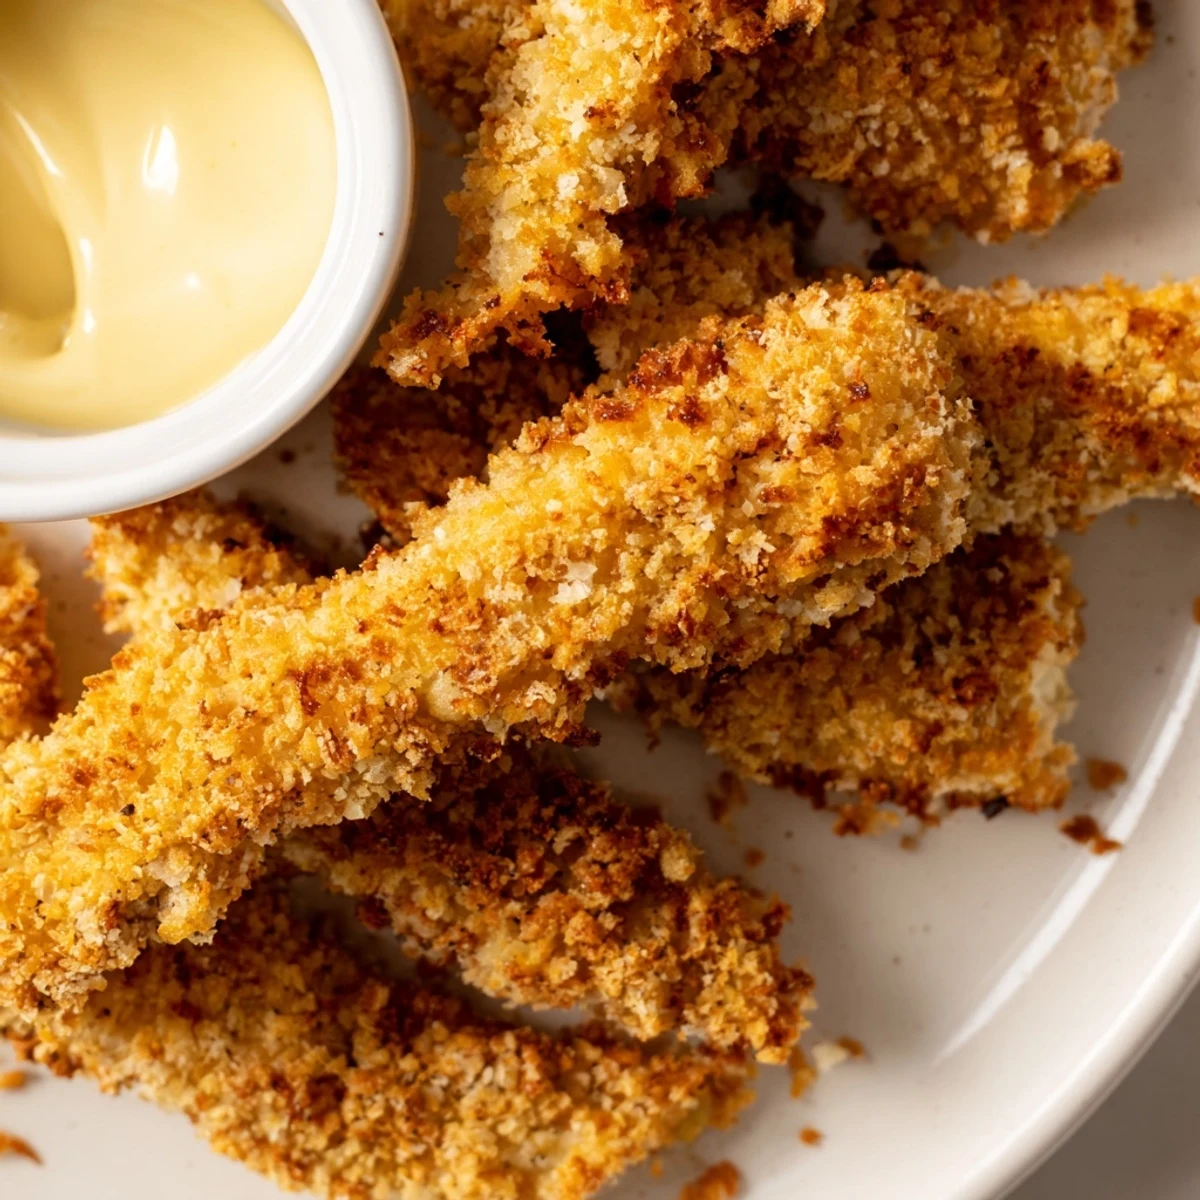
Save These tender chicken strips are coated in a crunchy blend of panko and Parmesan, then baked until golden. The honey mustard dip balances sweetness with a zesty kick, enhancing the crispy texture. Quick to prepare and cook, this dish offers a satisfying blend of flavors and textures, perfect for a simple, flavorful main meal. Baking on a wire rack ensures an evenly crisp crust without excess oil, making it a lighter yet delicious option.
My sister called me one Tuesday asking if I could make something her kids would actually eat without complaint. I pulled out chicken tenders and remembered how my own kitchen always smells better when something's frying or baking—golden, buttery, a little bit savory. The trick I'd learned wasn't fancy: panko instead of regular breadcrumbs, a flip halfway through, and a dip that tastes like you spent way more time than you actually did. Twenty minutes later, three happy kids and one grateful sister later, I realized this was the kind of recipe that stays in rotation because it works every single time.
I made these for a potluck once where everyone brought something pretentious, and somehow the chicken tenders disappeared first. There's something about food that doesn't pretend to be anything other than what it is—crispy, warm, honest—that makes people come back for thirds. That's when I knew this wasn't just a weeknight dinner, it was a crowd-pleaser that worked.
Ingredients
- Chicken tenders or breast strips, 1 lb: Use tenders if you can find them, but regular breasts cut into strips work just as well and sometimes cost less. Pat them dry before coating—wet chicken won't crisp up properly, and that's the whole point here.
- Panko breadcrumbs, 1 cup: This is where the crunch comes from, and honestly, panko alone would be fine if you're in a hurry. The regular breadcrumbs just add a little texture variation, but panko is doing the heavy lifting.
- Regular breadcrumbs, 1/2 cup: Think of these as the supporting player that helps the panko stick and create those little pockets of crispiness.
- Parmesan cheese, grated, 1/2 cup: Adds a savory note that makes people wonder what your secret is, so don't skip it or use the pre-shredded stuff if you can help it.
- Garlic powder, paprika, salt, and black pepper: These four ingredients are the flavor base—don't be shy with them, they disappear into the coating and make everything taste more like itself.
- Eggs and milk, for the wet mixture: This is your adhesive, and whisking them together smooth helps the breadcrumbs stick evenly rather than clumping.
- Olive oil spray: A light coating on top helps browning and gives you those crispy edges without drowning the chicken in oil.
- Mayonnaise, Dijon mustard, honey, lemon juice: For the dip—this combination is a formula I learned from watching my mom make vinaigrettes, just sweeter and creamier. The acid from the lemon cuts through the richness perfectly.
Instructions
- Set up your baking station:
- Preheat the oven to 425°F and line a baking sheet with parchment paper, then top it with a wire rack. This rack is key—it lifts the chicken so hot air circulates underneath and crisps the whole thing, not just the top. Spray it lightly so nothing sticks.
- Make your coating mixture:
- Combine panko, regular breadcrumbs, Parmesan, garlic powder, paprika, salt, and pepper in one shallow bowl. Mix it with your hands or a fork until it looks even and the cheese is distributed throughout—you want every piece of chicken to taste the same.
- Prepare the egg bath:
- Whisk eggs and milk together in another bowl until smooth and combined. This mixture acts like glue, holding the breadcrumb coating in place while everything bakes.
- Coat the chicken:
- Pat your chicken pieces dry with paper towels—this step matters more than you'd think because moisture stops the coating from crisping. Dip each piece in the egg mixture, let the excess drip off, then press it into the breadcrumb coating, turning it over to coat both sides. Don't be gentle here; press firmly so the crumbs actually stick.
- Arrange and spray:
- Place the coated chicken pieces on the prepared rack, making sure they don't touch. Give each one a light spray of olive oil on top—this helps them brown and crisp without making them greasy.
- Bake and flip:
- Bake for 9 to 10 minutes, then flip each piece carefully with tongs and bake another 9 to 10 minutes. You're looking for golden-brown color and an internal temperature of 165°F at the thickest part. If they're browning too fast, lower the heat slightly.
- Make the dip while they bake:
- Whisk together mayonnaise, Dijon mustard, honey, lemon juice, and a pinch of salt in a small bowl until it's smooth and creamy. Taste it—if it feels too mustardy, a touch more honey mellows it out, and if it's too sweet, lemon juice brings it back to balance.
- Serve while hot:
- Pull the chicken from the oven when it's golden and crispy, let it cool for just a minute so you don't burn your mouth, and serve with the dip on the side. Everything tastes better warm.
 Save
Save The best moment I had with this recipe was when my nephew, who claims to hate everything, asked for seconds and then asked if he could help me make them next time. That's when you know you've made something that matters—not because it's complicated, but because it tastes like someone who cares made it.
Why the Coating Matters
The difference between rubbery chicken tenders and ones that make people pause mid-bite isn't magic—it's technique and timing. The panko creates little air pockets that turn golden and crispy in a hot oven, while the Parmesan adds umami depth that plain breadcrumbs can never achieve. That wire rack elevates everything so hot air circulates freely instead of trapping steam underneath. I learned this the hard way after years of making soggy versions, and once I understood why each step matters, I never went back.
The Honey Mustard Dip Secret
This dip works because it balances three flavor notes that naturally complement each other: the sharp tang of Dijon mustard, the smooth richness of mayo, and the gentle sweetness of honey. The lemon juice is the quiet hero—it keeps everything tasting bright and prevents the dip from feeling heavy or one-dimensional. Once you understand this ratio, you can adjust it to your taste, and suddenly you're not just following a recipe, you're making something that's actually yours.
Make-Ahead and Storage Tips
These chicken tenders are one of the rare recipes that actually improves when you plan ahead. You can coat them up to 4 hours in advance, refrigerate them on the baking sheet, and bake them straight from cold—they'll just need an extra minute or two and come out just as crispy. Leftovers reheat beautifully in a 350°F oven for about 8 minutes if you want them warm, or they're honestly delicious cold the next day in a sandwich.
- Make the dip up to 2 days ahead and store it in the fridge—the flavors actually meld better overnight.
- If you're batch-cooking for the week, coat the chicken and freeze it on the baking sheet for up to 2 months, then bake from frozen without thawing.
- Reheating in the oven preserves the crispy texture way better than a microwave, which turns everything into a sad, rubbery version of itself.
 Save
Save This recipe has become my answer to the question that appears in every kitchen at some point: what do I make when I need something good, fast, and reliable? It's the kind of food that brings people together because it's honest and satisfying, not because it's trying to be something it's not.
Recipe Questions & Answers
- → How do I achieve extra crispy chicken tenders?
-
Use only panko breadcrumbs for a lighter, crunchier coating and ensure the chicken is baked on a wire rack for even crisping.
- → Can I prepare the chicken tenders ahead of time?
-
Yes, chicken tenders can be coated and refrigerated, then baked fresh to maintain the crispy texture.
- → What is the best way to bake chicken tenders evenly?
-
Place tenders on a wire rack over a baking sheet and flip halfway through baking for golden, even cooking.
- → How should I store leftovers to keep them crunchy?
-
Store leftovers in an airtight container and reheat in the oven on a wire rack to restore crispiness.
- → What gives the honey mustard dip its tangy flavor?
-
Dijon mustard combined with fresh lemon juice creates the dip’s signature sweet and tangy profile.
