 Save
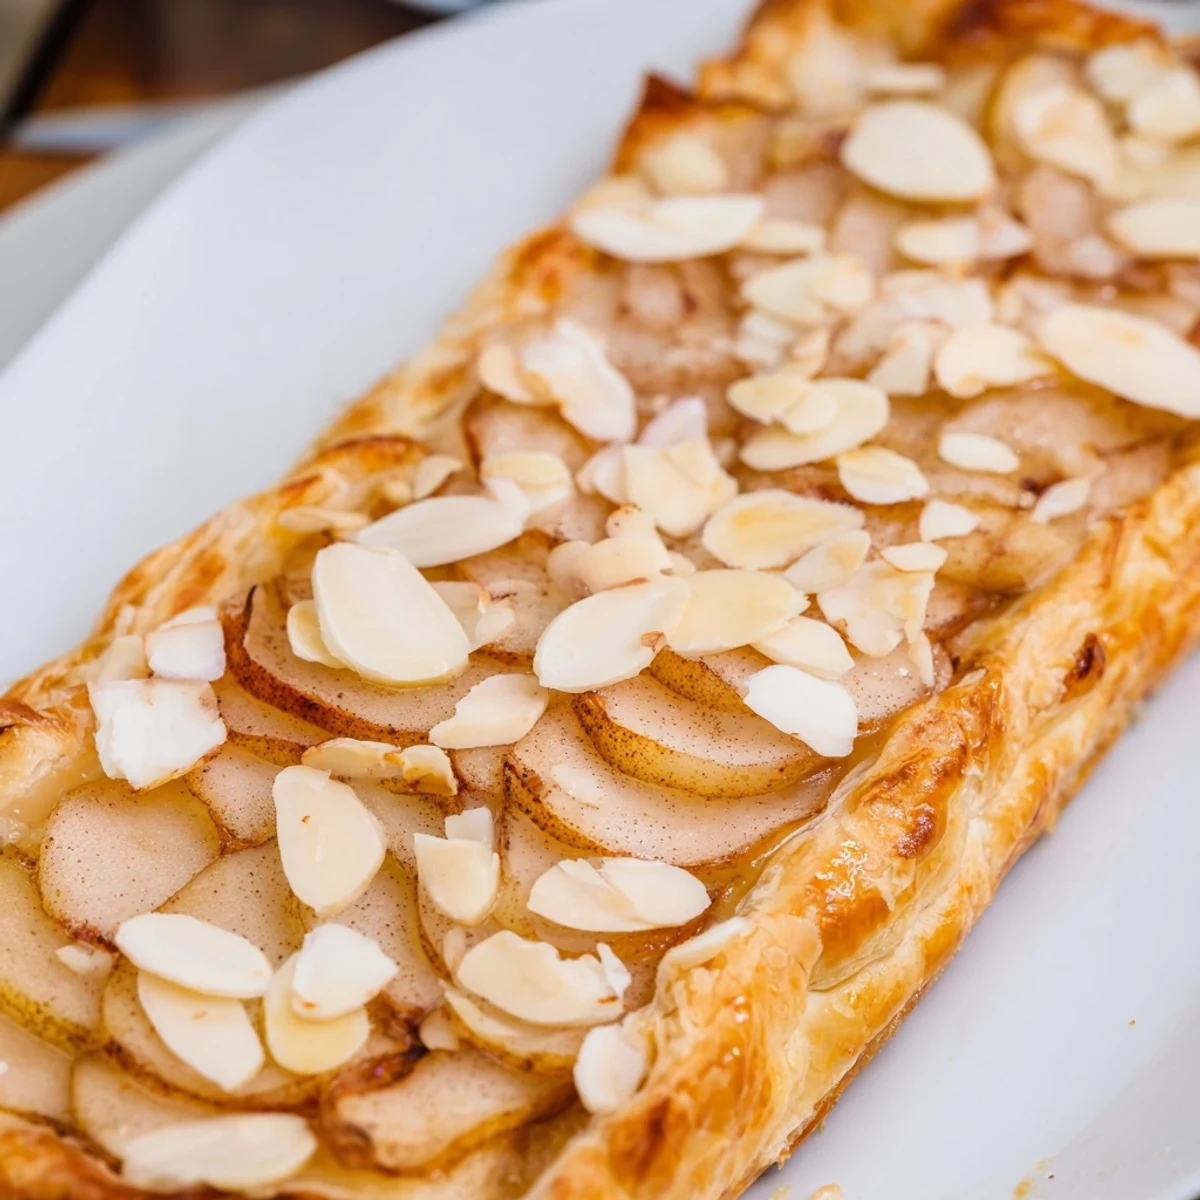
Save These elegant tarts feature flaky puff pastry topped with thinly sliced pears that have been tossed with warming spices like cinnamon, nutmeg, and ginger. The fruit macerates in brown sugar before being arranged on the pastry and brushed with melted butter. After baking, the pastry turns golden and crisp while the pears become tender and lightly caramelized. A dusting of powdered sugar adds the perfect finishing touch.
The smell of cinnamon and brown sugar hitting warm butter still stops me in my tracks, reminding me of a tiny Paris kitchen where I first learned that fancy desserts can actually be simple. I watched a neighbor's grandmother toss pear slices into a bowl with nothing more than spices from her worn wooden box, her hands moving with the confidence of someone who'd made this a thousand times. Those tarts came out of her oven golden and bubbling, transforming basic ingredients into something that felt like magic. Now I make them whenever I need to bring a little elegance to the table without spending hours there.
Last autumn, my sister showed up with three pears that were going soft and a sheet of puff pastry she'd bought on impulse. We stood in my kitchen, debating whether to attempt something fancy or just slice them over yogurt, but the spices won. The way the house smelled while they baked convinced us to skip dinner entirely and eat tarts standing at the counter instead. Sometimes the best meals happen when you're not trying that hard.
Ingredients
- 3 ripe pears: Choose ones that give slightly to pressure but aren't mushy, they'll hold their shape better during baking and the texture contrast against the flaky pastry is worth the extra attention at the market
- 1 tablespoon lemon juice: This little trick keeps the pears from oxidizing and turning brown while you're working, plus it adds a bright note that cuts through all that warm spice
- 3 tablespoons brown sugar: The molasses in brown sugar gives you that deeper caramel flavor you just can't get from white sugar, and it helps create those gorgeous sticky edges
- 1 teaspoon ground cinnamon: Fresh cinnamon makes a huge difference here, if yours has been sitting in the cabinet for years, treat yourself to a new jar
- 1/4 teaspoon ground nutmeg: A little goes a long way, but it adds that warmth people can't quite put their finger on
- 1/4 teaspoon ground ginger: This is the secret ingredient that gives the pears a slight kick and keeps them from being too one-note sweet
- Pinch of salt: Don't skip this, it's what makes all the flavors pop and keeps the tarts from tasting like dessert for toddlers
- 1 sheet frozen puff pastry: Thaw it in the fridge overnight if you can remember, but even the emergency counter-thaw method works in a pinch
- 1 egg, beaten: The egg wash gives you that professional golden sheen that makes people think you know secrets you definitely don't
- 1 tablespoon unsalted butter, melted: Brushing this over the pears helps them caramelize instead of just drying out in the oven's heat
- 2 tablespoons sliced almonds: Totally optional, but they add this lovely nutty crunch that plays so nicely with the tender fruit
- Powdered sugar: The final dusting makes everything look intentional and polished, like these tarts didn't come together in under an hour
Instructions
- Get your oven ready:
- Preheat to 400°F and line a baking sheet with parchment paper, don't skip the parchment unless you enjoy scraping caramelized sugar off metal for twenty minutes
- Prep the pears:
- Toss the sliced pears with lemon juice, brown sugar, cinnamon, nutmeg, ginger, and salt in a large bowl, then let them hang out for 10 minutes to get friendly with the spices
- Shape the pastry:
- Cut your thawed puff pastry into 6 equal rectangles or circles on a lightly floured surface, then arrange them on your prepared baking sheet with some room to puff
- Add some shine:
- Brush the edges of each pastry piece with beaten egg, this creates that beautiful golden border that makes everyone think you went to pastry school
- Arrange the fruit:
- Drain any excess liquid from the pears and layer them neatly on the pastry, leaving about a half-inch border so the edges can rise up around the fruit like a little frame
- The finishing touches:
- Brush the pears with melted butter and scatter those sliced almonds on top if you're using them, they'll toast up nicely alongside the fruit
- Bake until golden:
- Slide them into the oven for 22 to 25 minutes, until the pastry is deeply golden and you can smell caramelized sugar filling your kitchen
- The final dusting:
- Let them cool slightly on the pan, then sift powdered sugar over the top right before serving, it melts a little into the warm pears and looks absolutely gorgeous
 Save
Save My daughter requested these for her birthday instead of cake, which I took as the highest compliment. She sat at the counter eating one warm while the others cooled, cinnamon sugar on her chin, telling me I should make these every single day. Sometimes the simplest traditions are the ones that stick.
Make-Ahead Magic
You can slice and spice the pears up to a day in advance, keeping them refrigerated in a sealed container. The puff pastry can also be cut and arranged on the parchment paper, then covered and chilled until you're ready to assemble. This makes actual baking time about ten minutes of active work.
Serving Suggestions
These tarts are stunning on their own but absolutely sing with a scoop of vanilla ice cream melting into the warm fruit. I've also served them alongside a dollop of crème fraîche for something a bit more sophisticated, or with a drizzle of honey if the pears weren't quite sweet enough.
Fruit Swaps and Seasonal Twists
Apples work beautifully here, especially tart varieties that hold their shape through baking. In the summer, stone fruits like peaches or plums are incredible with the same spice treatment, and frozen berries can be used in a pinch though they'll release more liquid. Just adjust your baking time by a few minutes either way.
- Try adding a pinch of cardamom to the spice mix if you want to feel fancy
- A splash of vanilla extract or almond extract in the pear bowl adds depth
- These reheat surprisingly well in a 350°F oven for about 5 minutes
 Save
Save There's something deeply satisfying about turning basic ingredients into something that looks like it came from a bakery window. These tarts have become my go-to for moments when I want to make people feel special without disappearing into the kitchen for hours.
Recipe Questions & Answers
- → Can I use apples instead of pears?
-
Yes, apples work beautifully in this preparation. Use firm varieties like Granny Smith, Honeycrisp, or Braeburn for best results. Slice them thinly and follow the same seasoning and baking process.
- → How do I know when the pastry is done?
-
The pastry should be deep golden brown and puffed up all over. You can also gently lift the edge to check the bottom—it should be evenly browned and crisp, not pale or doughy.
- → Can I prepare these ahead of time?
-
You can prepare the spiced pears and cut the pastry shapes up to a day ahead. Store them separately in the refrigerator. Assemble and bake just before serving for the freshest texture and flavor.
- → What's the best way to slice the pears?
-
Use a sharp knife or mandoline to create thin, even slices about 1/8 inch thick. This ensures they cook through evenly and arrange neatly on the pastry. Uniform slices also create an attractive presentation.
- → Do I need to peel the pears?
-
Peeling is recommended for a tender texture and more refined appearance. The skin can become tough during baking. However, if you prefer extra fiber and don't mind the texture, leave the skin on.
- → What temperature should I serve these at?
-
These tarts are delicious warm, at room temperature, or even chilled slightly. For the best experience, serve them warm (about 15-20 minutes after baking) when the pastry is still crisp and the pears are tender.
