 Save
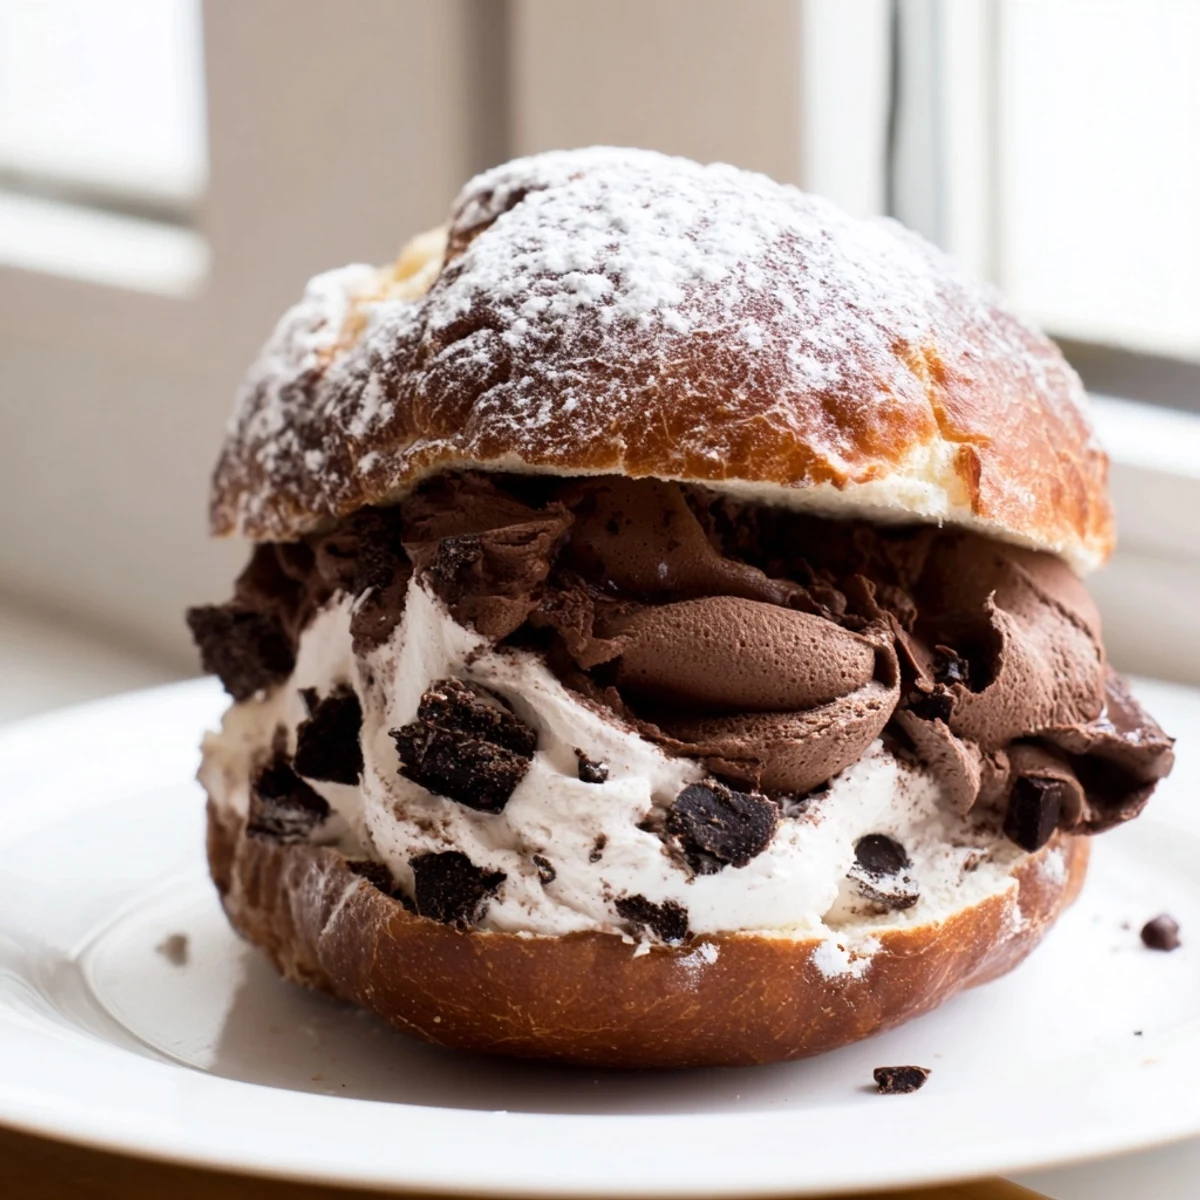
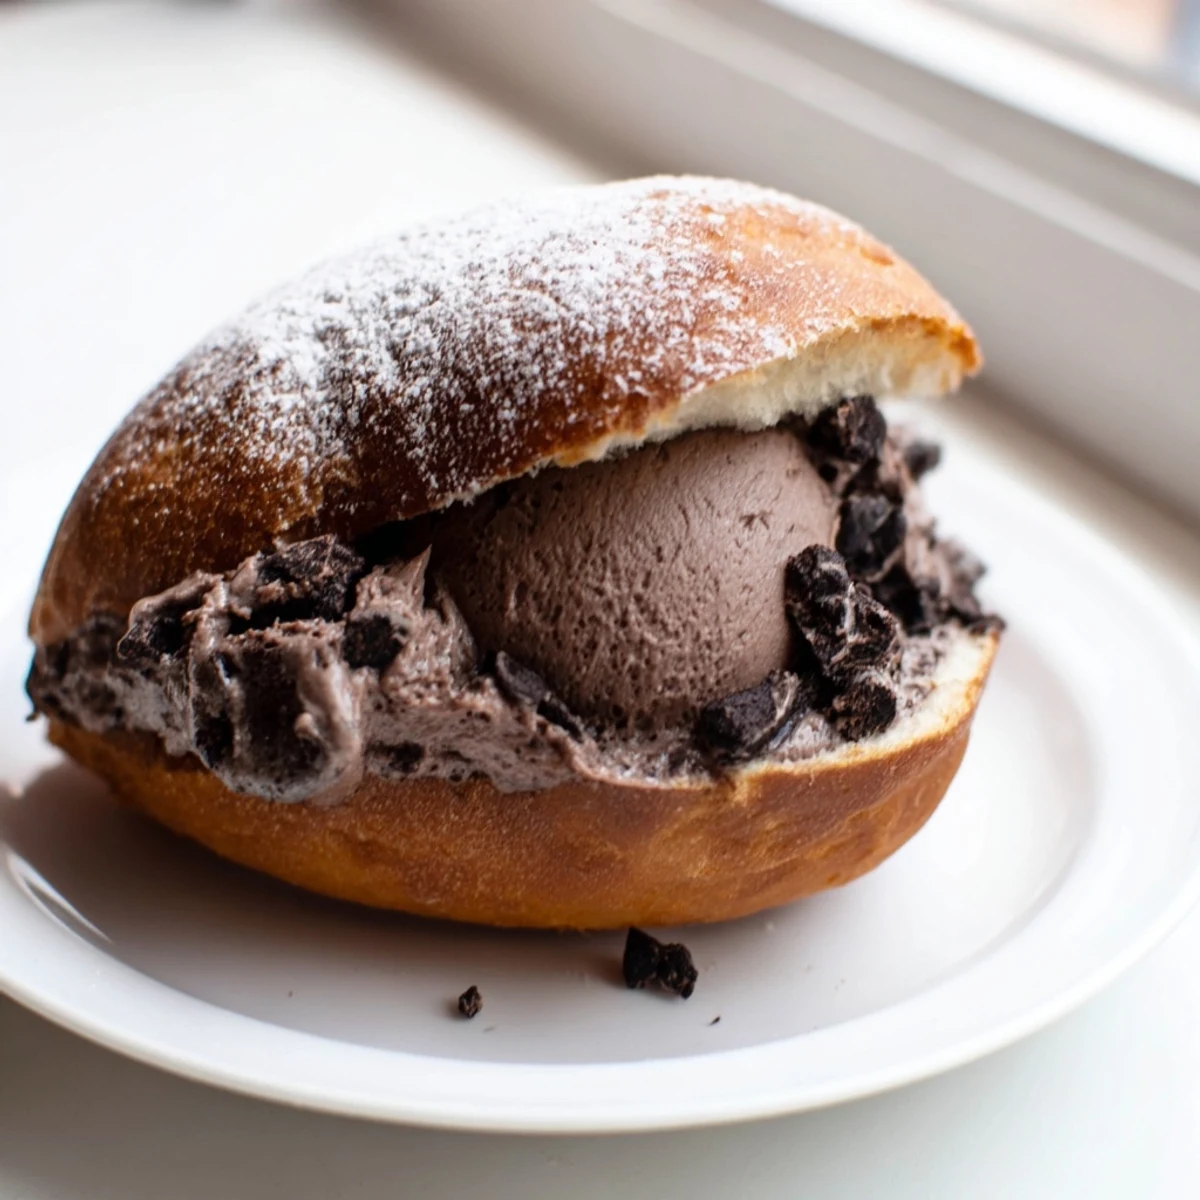
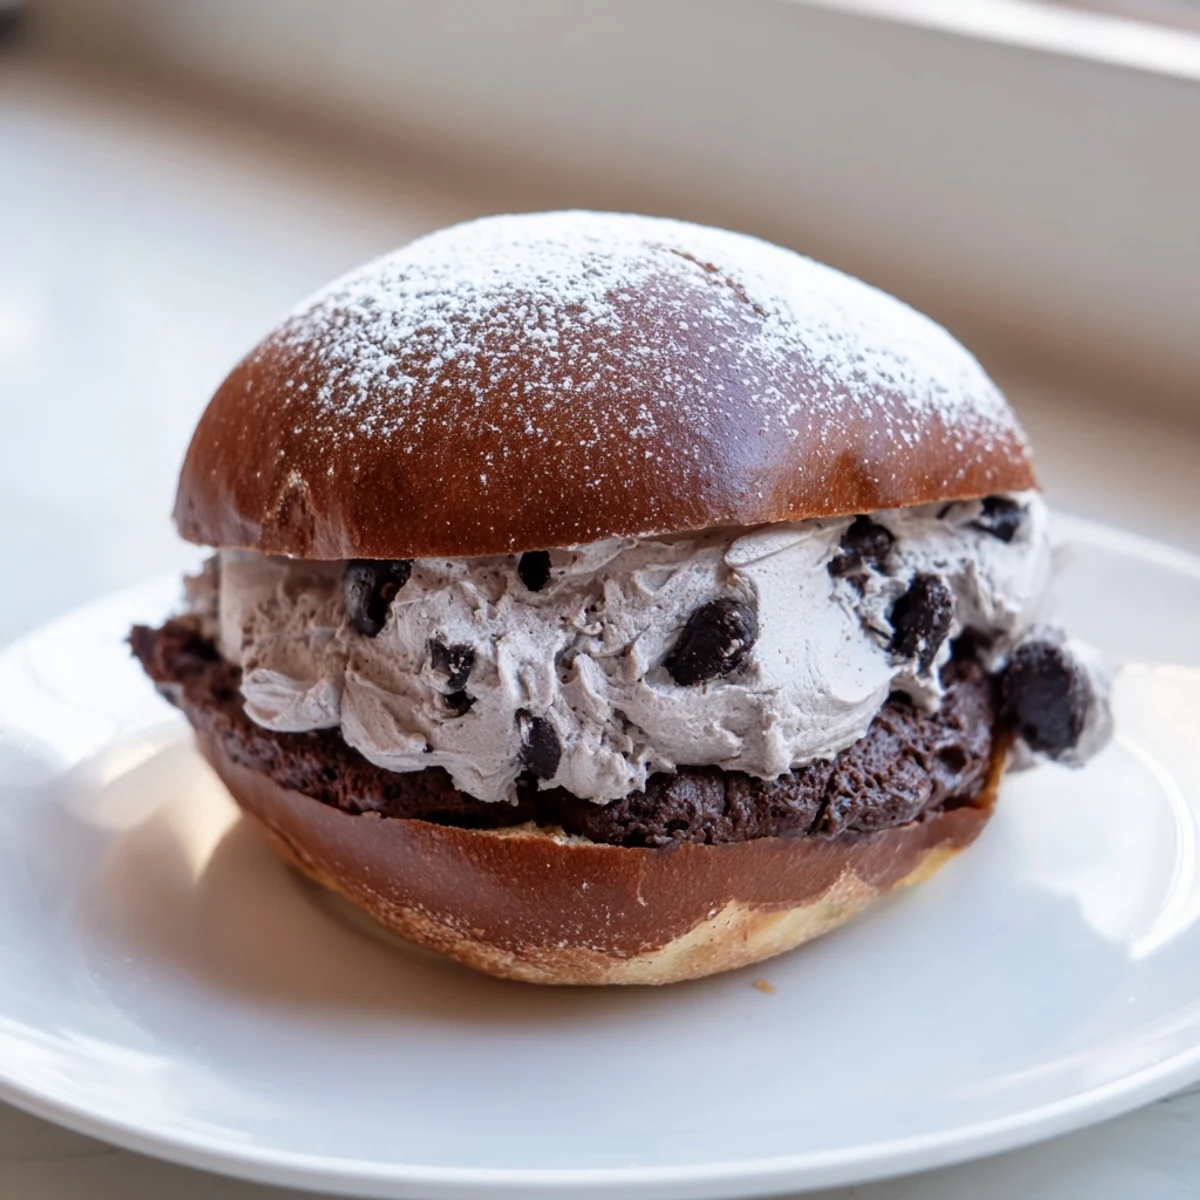
Save Maritozzi are beloved Roman sweet buns, traditionally enjoyed at breakfast with espresso. These chocolate-filled versions pair a soft, cocoa-enriched dough with chunks of dark chocolate, baked until golden and pillowy.
Once cooled, each bun is sliced and generously filled with a luscious whipped cream folded with melted dark chocolate, creating an indulgent treat perfect for weekend mornings or special occasions.
My apartment smelled like a Roman bakery for three days straight after I first attempted chocolate maritozzi, and I have zero regrets about that. The combination of cocoa enriched dough and that cloud of chocolate whipped cream spilling out the top is almost unfairly good. I ate two before they even had a chance to cool properly, standing over the kitchen counter with powdered sugar on my nose. This indulgent twist on the classic Roman breakfast pastry is worth every minute of the wait.
I brought a tray of these to a friends Sunday brunch and watched three adults abandon all pretense of polite portions within minutes. Someone actually said these were better than the ones they had in Rome, though I suspect the espresso and good company helped that claim along.
Ingredients
- 350 g all-purpose flour: The backbone of the dough, providing structure without making it tough.
- 40 g unsweetened cocoa powder: This is what transforms ordinary maritozzi into something deeply chocolatey and aromatic.
- 120 ml whole milk, lukewarm: Warmed gently to wake the yeast without killing it, aim for bathwater temperature.
- 60 g granulated sugar: Just enough sweetness in the dough to complement the bitter cocoa without overwhelming it.
- 7 g active dry yeast: One standard packet, the magic that makes these buns pillowy and light.
- 1 large egg: Enriches the dough and helps create that tender, cakey crumb.
- 40 g unsalted butter, softened: Adds richness and keeps the buns soft for hours after baking.
- 1/2 tsp vanilla extract: A quiet background note that rounds out the chocolate flavor beautifully.
- 1/2 tsp salt: Essential for balancing sweetness and deepening the overall flavor of the dough.
- 60 g dark chocolate, chopped: Folded in at the end for little pockets of melted chocolate throughout each bun.
- 300 ml heavy whipping cream: The base of the filling, needs to be very cold for the best volume when whipped.
- 70 g dark chocolate, melted and cooled: Folded into the whipped cream for a rich, truffle-like filling.
- 30 g powdered sugar: Sweetens the cream filling gently without making it grainy.
- 1 tsp vanilla extract (filling): Enhances the chocolate in the cream and adds warmth.
- 1 egg yolk plus 2 tbsp milk (for brushing): Creates that beautiful shine on top of each bun during baking.
Instructions
- Wake up the yeast:
- Stir the yeast and one tablespoon of sugar into the lukewarm milk and let it sit for about 10 minutes until it turns bubbly and fragrant on top. If nothing happens, your yeast may be expired and you should start fresh.
- Build the dry base:
- In a large bowl, whisk together the flour, cocoa powder, remaining sugar, and salt until evenly blended and no cocoa lumps remain. The mixture should look like a uniform dusty brown powder.
- Bring the dough together:
- Create a well in the center of the dry ingredients and drop in the egg, vanilla, softened butter, and the foamy yeast mixture. Stir with a wooden spoon until a shaggy, sticky dough starts to form and pull away from the sides.
- Knead until silky:
- Turn the dough out and knead by hand or with a mixer for 8 to 10 minutes until it becomes smooth, elastic, and slightly tacky but not sticking to your fingers. Scatter in the chopped chocolate during the last two minutes of kneading so the pieces distribute evenly without melting into the dough.
- First rise:
- Transfer the dough to a clean, lightly oiled bowl, cover it with a damp towel or plastic wrap, and leave it in a warm spot for 1 to 2 hours until it has puffed up and roughly doubled in size.
- Shape the buns:
- Gently punch down the dough and divide it into 8 equal pieces, then roll each into a plump oval shape and set them on a parchment lined baking tray with space between them for spreading.
- Second rise:
- Cover the shaped buns loosely and let them rest for 40 minutes until they look noticeably puffed and soft to the touch.
- Brush and bake:
- Preheat your oven to 180 degrees Celsius and whisk the egg yolk with the milk, then brush this mixture gently over each bun. Bake for 15 to 18 minutes until the tops are set and the buns sound slightly hollow when tapped underneath.
- Make the chocolate cream:
- While the buns cool, whip the cold heavy cream with powdered sugar and vanilla to firm peaks that hold their shape when the whisk is lifted. Gently fold in the melted and cooled dark chocolate with a spatula, being careful not to deflate all that lovely air you just whipped in.
- Fill and finish:
- Slice each cooled bun lengthwise with a serrated knife, leaving a hinge at the back so it opens like a book, then pipe or spoon a generous mound of chocolate cream into each one. Dust with extra powdered sugar if you want that classic bakery look, and serve right away.
 Save
Save There is something deeply satisfying about slicing open a bun you watched rise from nothing and filling it with cream you whipped by hand.
Serving Suggestions Worth Trying
These chocolate maritozzi are at their absolute best alongside a strong espresso or cappuccino, which cuts through the richness and makes you feel like you are sitting at a marble counter in a Roman pastry shop. I once served them with hot chocolate on a rainy afternoon and nearly fell asleep from contentment afterward.
Storage That Actually Works
The filled buns are best eaten the same day because the cream will slowly soften the bun overnight and you lose that contrast between the pillowy bread and the firm filling. If you need to prepare ahead, bake the buns and make the cream separately, then assemble just before serving for the best texture.
Little Tweaks That Make a Difference
I have experimented with this recipe more times than I care to admit, and small adjustments can shift the entire personality of the finished bun.
- Swapping the dark chocolate in the filling for milk chocolate gives you a sweeter, creamier result that kids tend to prefer.
- Scattering a few extra chocolate chips inside each bun before adding the cream creates a double texture that is completely irresistible.
- Always check your chocolate packaging for nut or soy traces if you are baking for someone with allergies, as this is easily overlooked.
 Save
Save These chocolate maritozzi are a labor of love that reward every minute of rising time with something truly unforgettable. Share them with someone who appreciates the magic of homemade bread and you will have a new tradition before you know it.
Recipe Questions & Answers
- → Can I make the dough ahead of time?
-
Yes, you can prepare the dough and let it rise overnight in the refrigerator. This slow fermentation actually enhances the flavor. Shape the buns and let them come to room temperature for about 30 minutes before baking.
- → Why did my buns not rise properly?
-
Ensure your yeast is fresh and the milk is lukewarm, not hot — temperatures above 46°C (115°F) will kill the yeast. Also, give the dough enough time in a warm, draft-free spot until it has visibly doubled in size.
- → Can I use milk chocolate instead of dark chocolate?
-
Absolutely. Milk chocolate will give the filling a sweeter, creamier profile. Just reduce the powdered sugar slightly to balance the overall sweetness.
- → How should I store leftover maritozzi?
-
Store filled maritozzi in the refrigerator for up to 2 days. The cream filling requires refrigeration. For best texture, let them sit at room temperature for 10–15 minutes before serving.
- → Can I freeze the baked buns before filling?
-
Yes, the unfilled buns freeze well for up to 1 month. Thaw them at room temperature, then fill with freshly made chocolate whipped cream when ready to serve.
- → What type of cocoa powder works best for the dough?
-
Use unsweetened cocoa powder for the best results. Dutch-processed cocoa will give a deeper, richer color and smoother flavor, while natural cocoa adds a slightly fruitier note.
